Multi-Factor Authentication (MFA)
To Strengthen security of your account and to protect procurement data we are introducing MFA. Passwords alone are often not enough to stop unauthorized access. Multi-Factor Authentication (MFA) adds an extra layer of security, ensuring that only you can access your account.
Benefits of MFA:
-
🔒 Stronger protection for your procurement transactions and supplier data.
-
✅ Compliance with industry-standard security practices.
-
🛡️ Reduced risk of unauthorized access, phishing, or account compromise.
-
MFA requires two steps to log in:
-
Something you know – your usual password.
-
Something you have – a verification method (e.g., one-time code on your phone).
-
-
Authentication options available:
-
📱 Authenticator App (Recommended) – Use apps like Microsoft Authenticator, Google Authenticator
-
✉️ Email OTP – Receive a one-time password in your registered email.
How to Configure MFA
If your organization requires MFA and you haven’t set it up yet, you’ll be taken to the MFA setup screen when you log in.
Step 1: Login
-
Enter your username and password as usual.
Step 2: MFA Setup Prompt - The system will ask you to choose your MFA method.
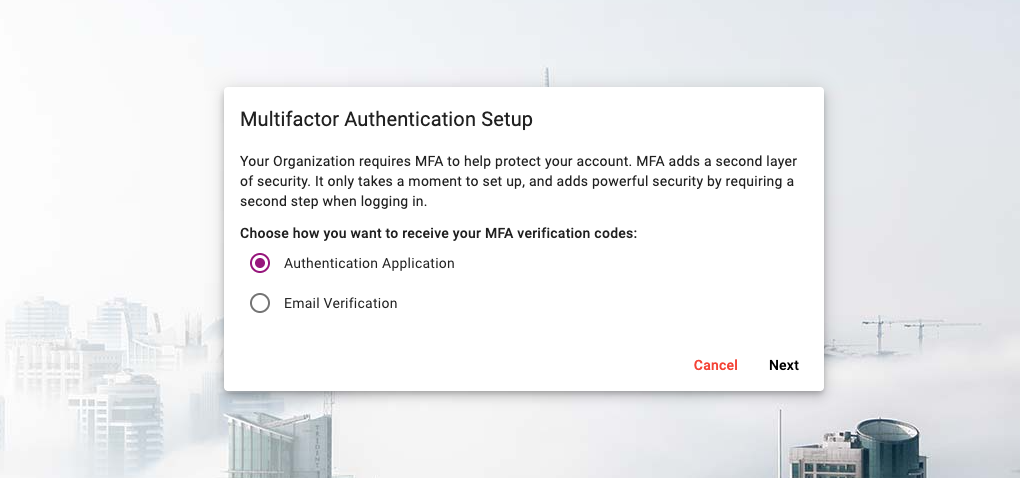
Step 3: Choose Preferred Method
-
Select Authenticator App or Email
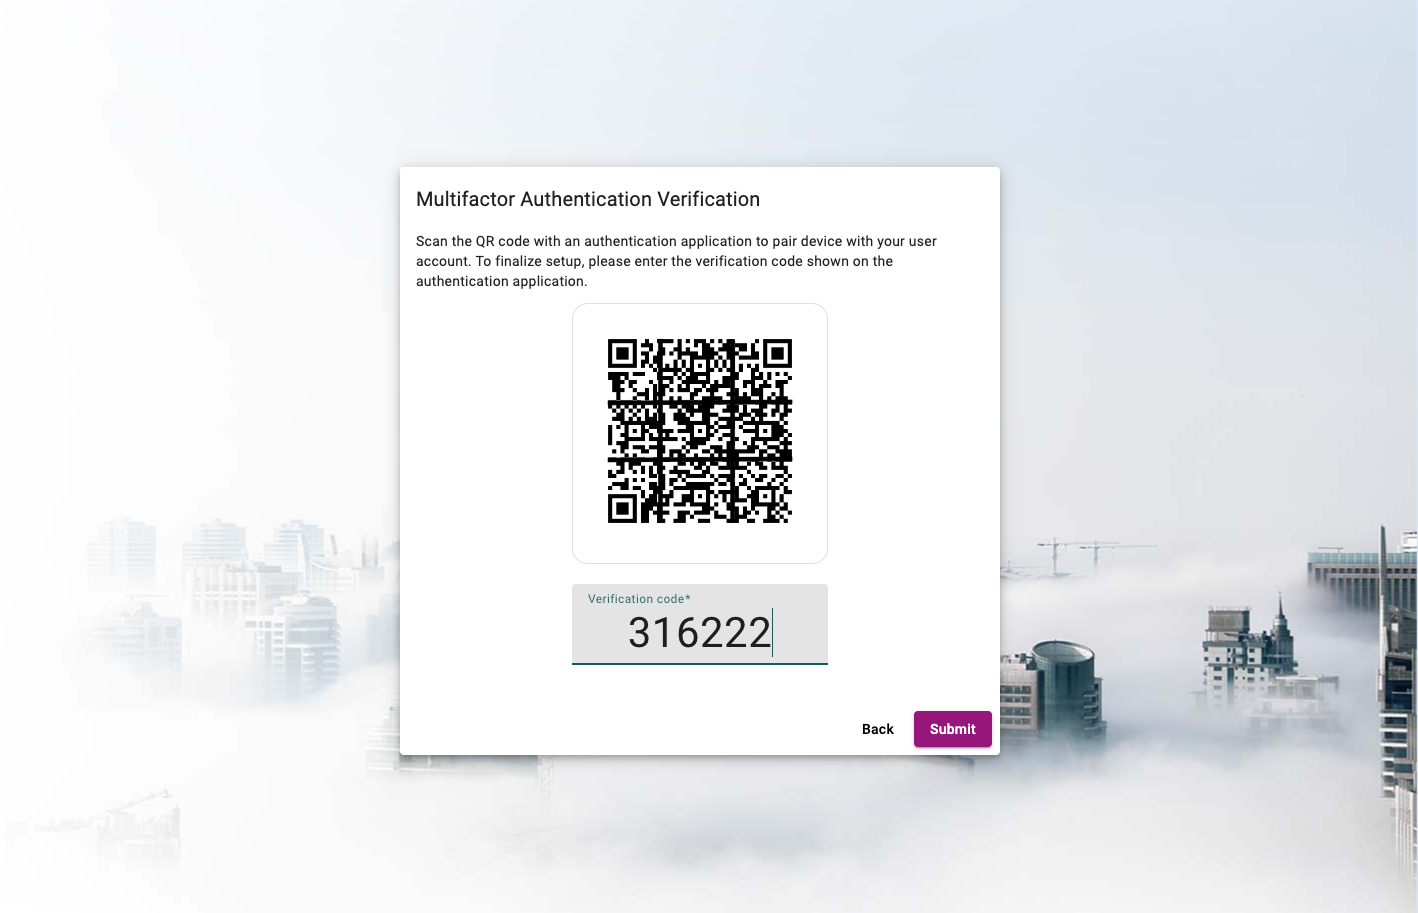
If you choose Authenticator App:
-
Download an authenticator app on your mobile.
-
Scan the QR code displayed on your screen.
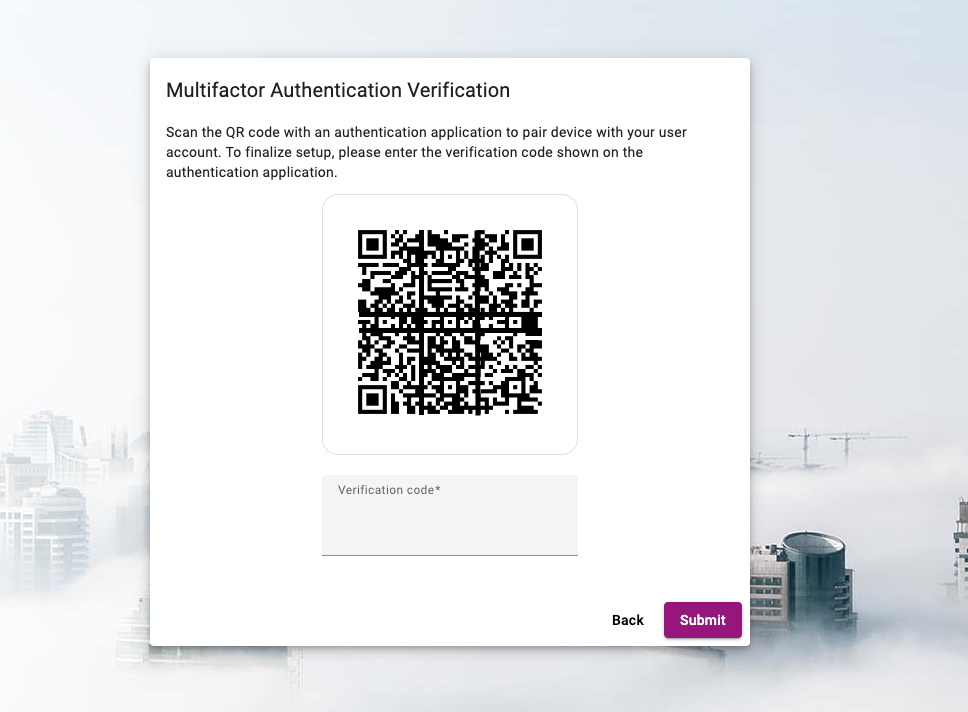
-
Enter the 6-digit code generated by the app to verify.
-
After entering a valid verification code, the setup will be completed, and the user will be redirected to the login page. During future logins, a MFA code will be required.
If you choose Email :
-
A one-time code will be sent to your registered email
-
Enter the code in the portal to confirm
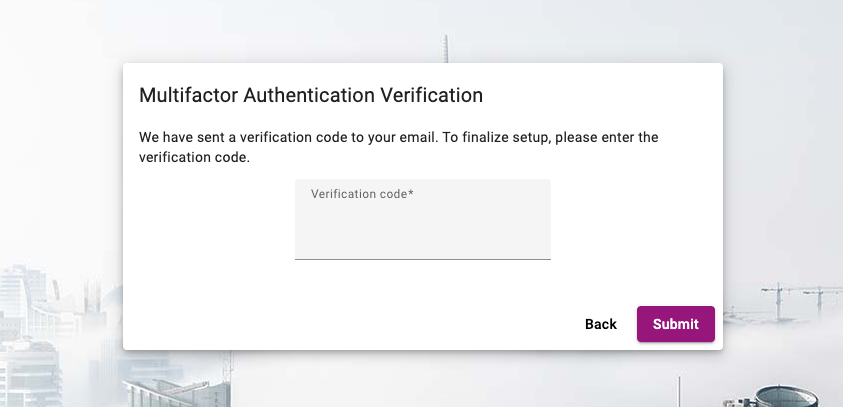
Save & Confirm
-
Your MFA is now enabled. From next login, you’ll be asked for both your password and the code sent to your email.
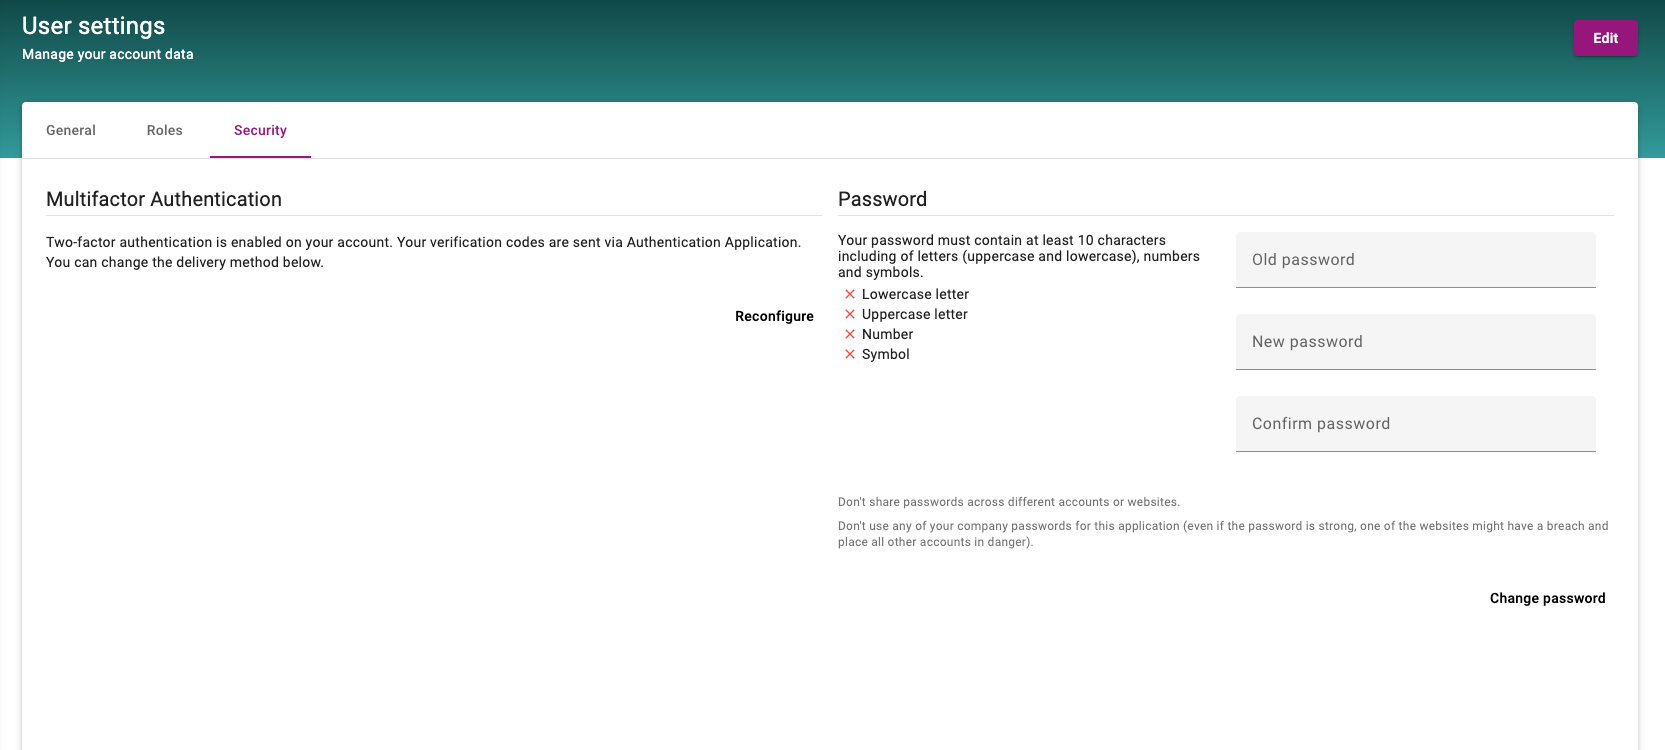
Change your MFA Preference
After logging in, go to user settings and click the Security tab access the MFA section. From there, they may reconfigure their MFA preferences by choosing a different authentication method.
Best Practices for Users
-
📌 Always keep your MFA device (mobile/email) secure.
-
🔄 If you change your phone or number, update your MFA settings immediately.
-
⚠️ Do not share your MFA codes with anyone.
Troubleshooting & Support
-
Not receiving codes? Check your spam/junk email folder or ensure your mobile number is correct in your profile.
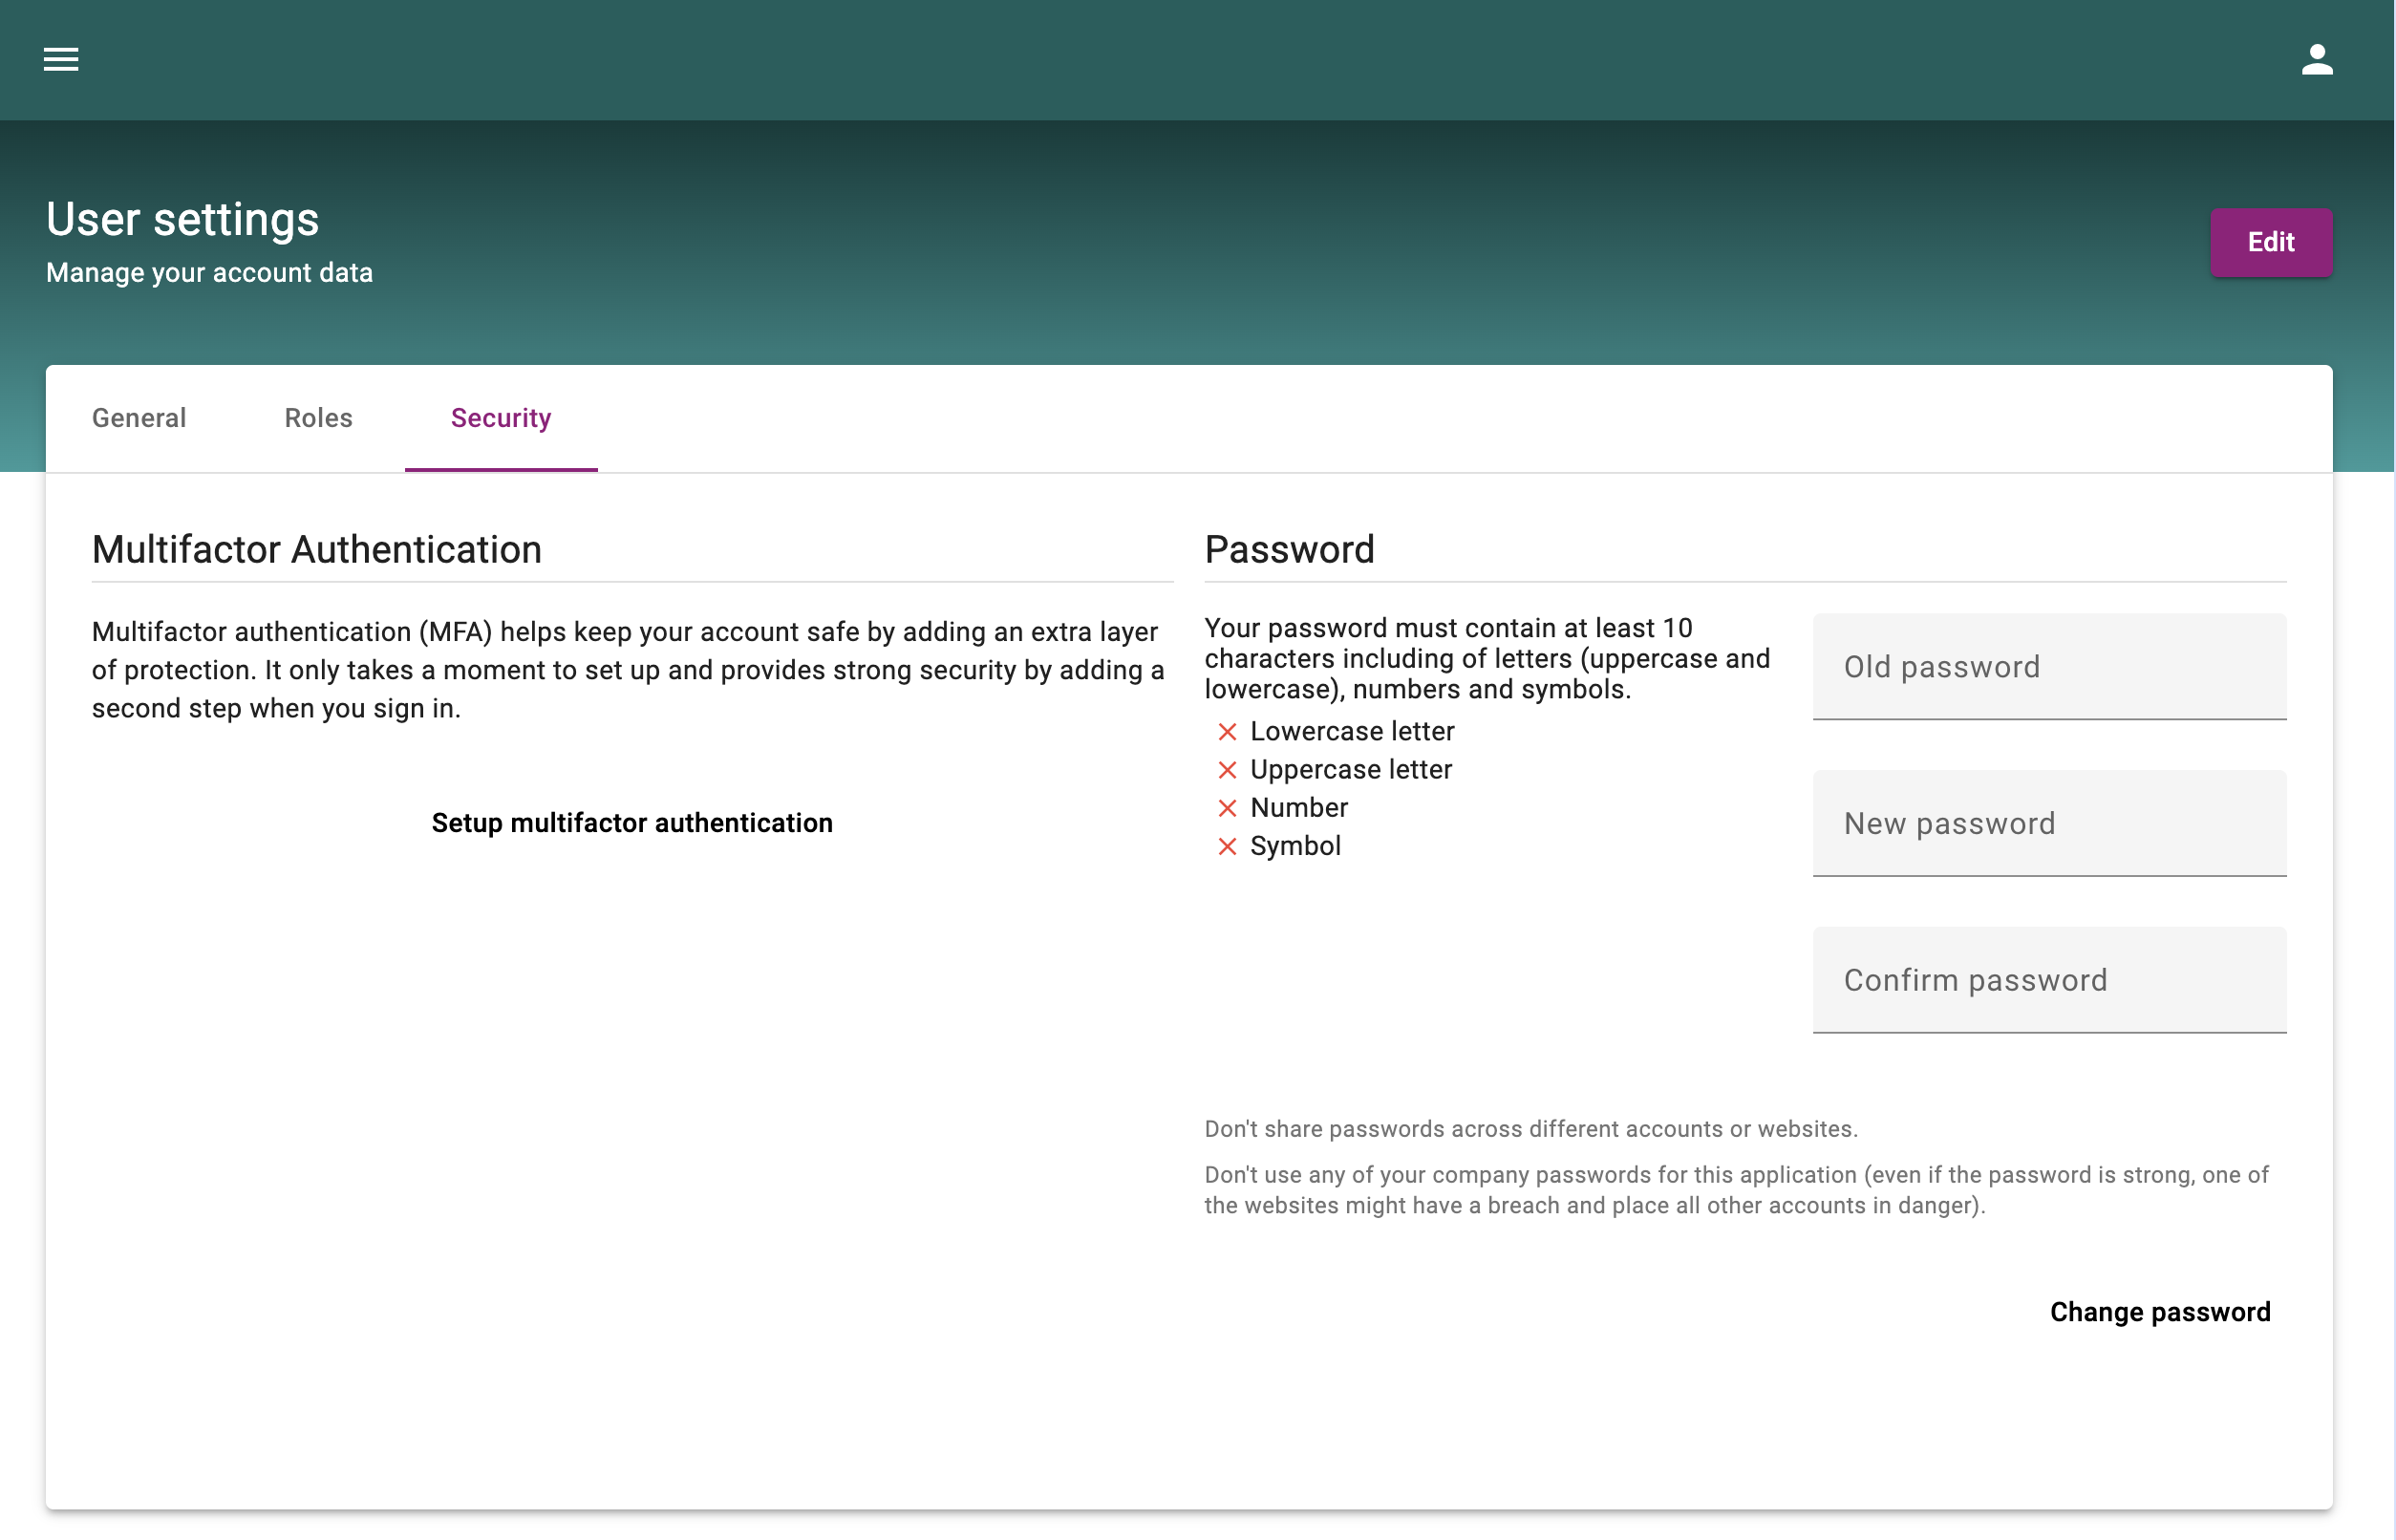
Users can choose to enable MFA on your account, even if your organization doesn’t require it. Turning it on adds an extra layer of protection and helps keep your account more secure.
Steps to turn on MFA for
-
Login to BeNeering cloud with your user name and password
-
click on user settings
-
click on security tab
-
click on Setup multifactor authentication
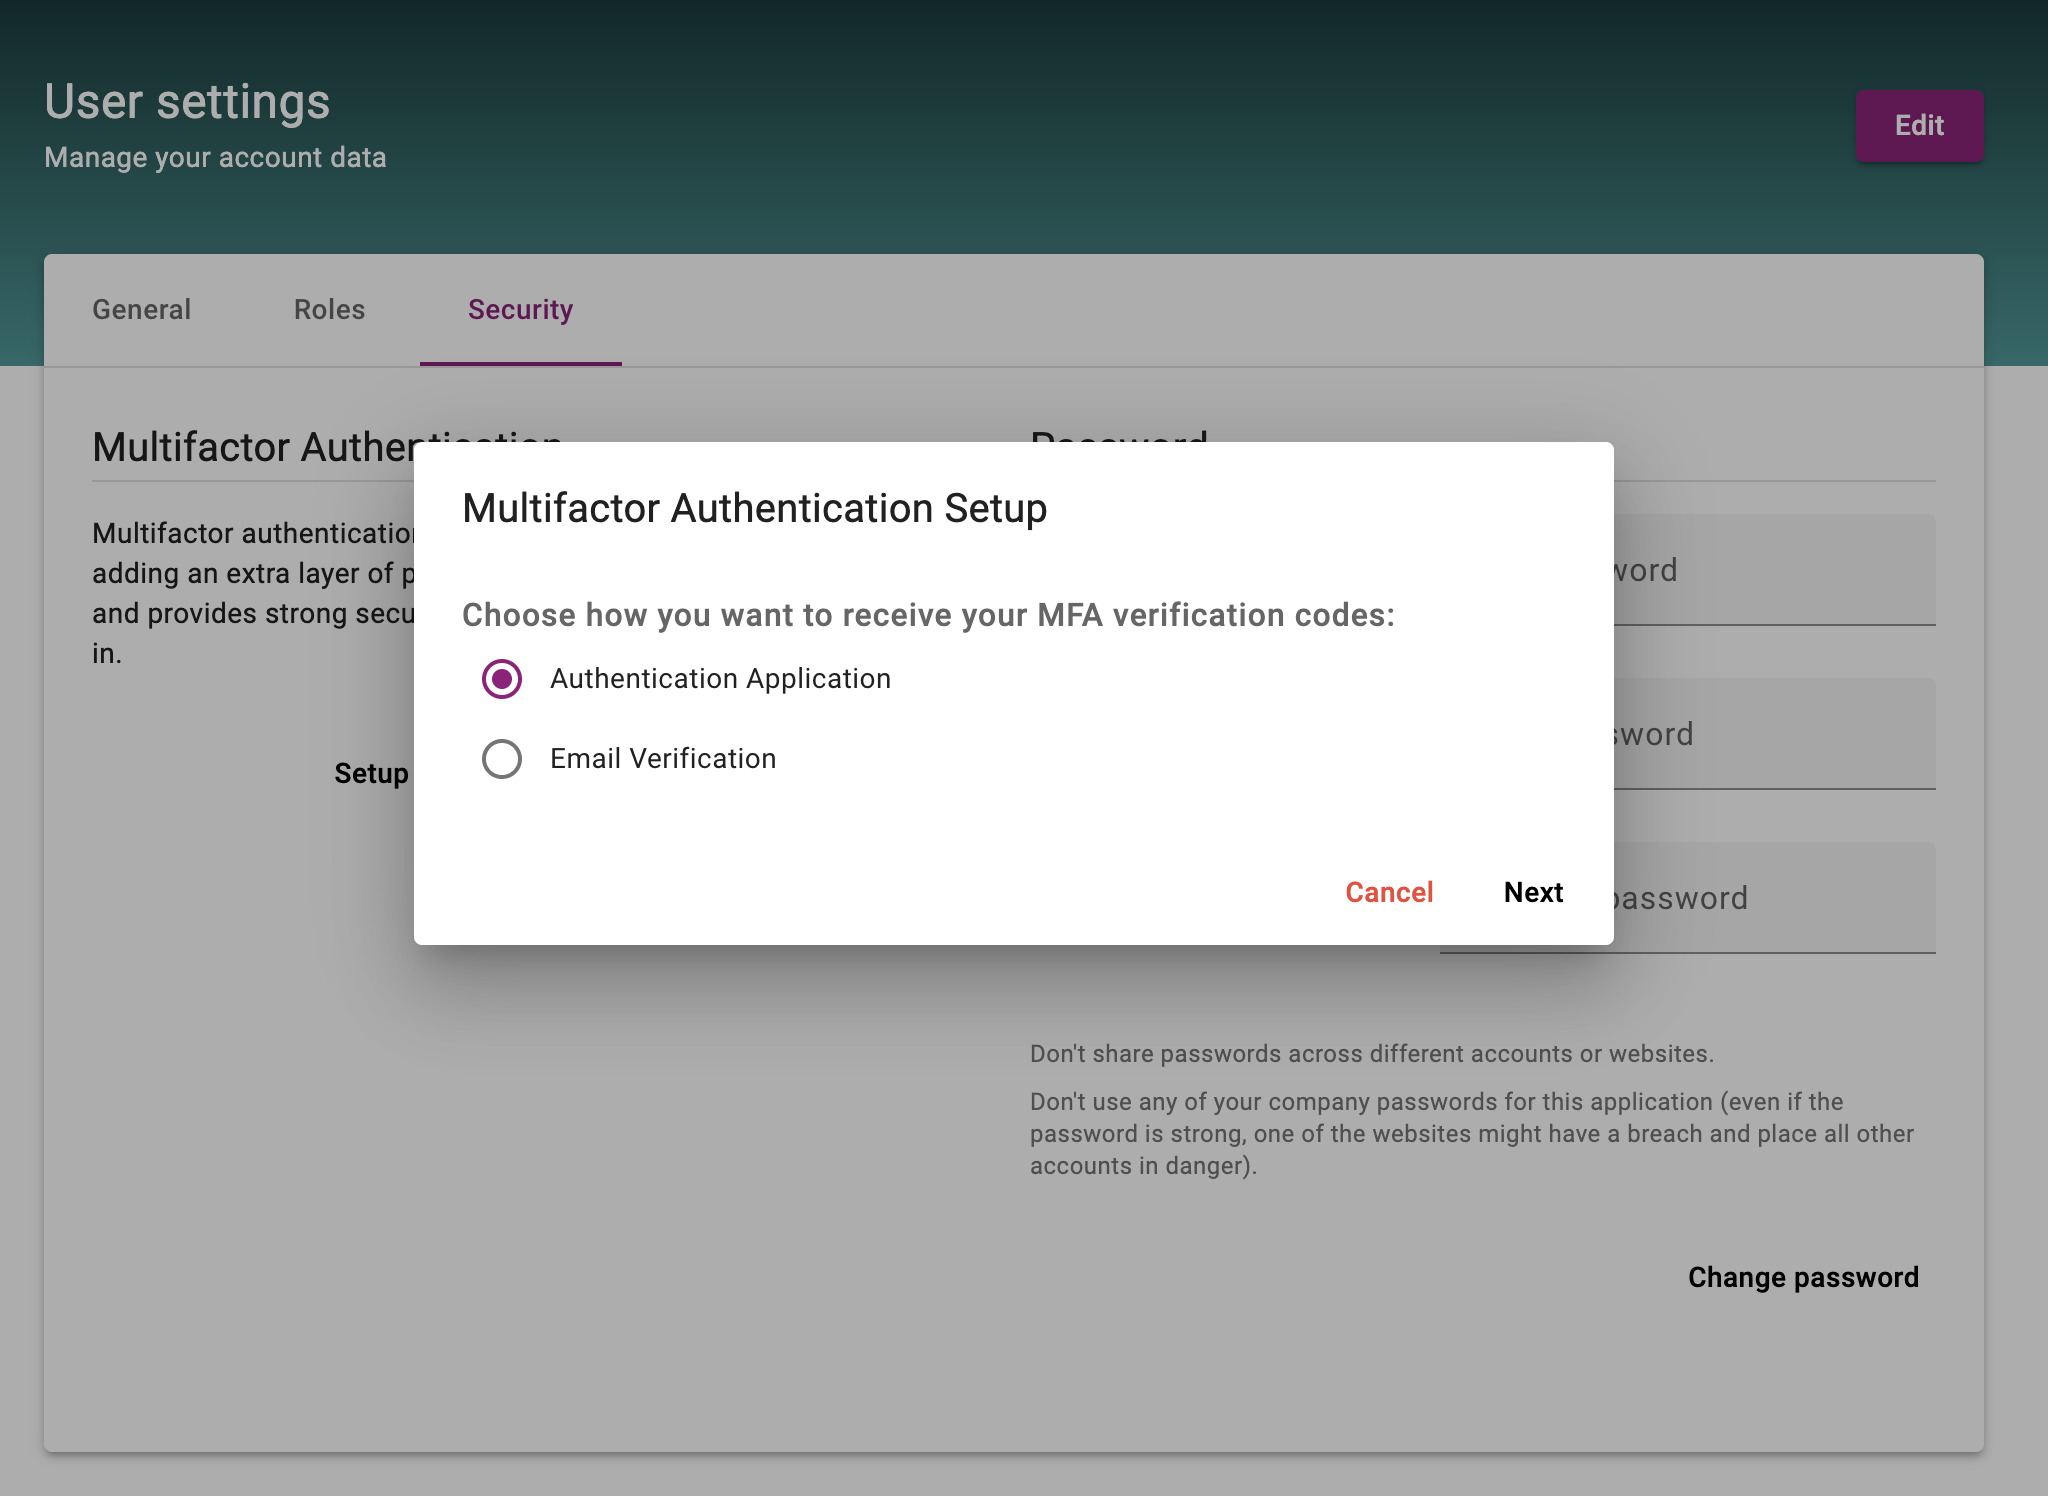
Choose Preferred Method
-
Select Authenticator App or Email
If you choose Authenticator App:
-
Download an authenticator app on your mobile.
-
Scan the QR code displayed on your screen.
Enter the 6-digit code generated by the app to verify.
After entering a valid verification code, the setup will be completed, and the user will be redirected to the login page. During future logins, a MFA code will be required.
If you choose Email :
-
A one-time code will be sent to your registered email
-
Enter the code in the portal to confirm
Save & Confirm
-
Your MFA is now enabled. From next login, you’ll be asked for both your password and the code sent to your email.
MFA Verification during Login
Once you’ve enabled and set up MFA, you’ll be asked to enter a verification code each time you log in. The code will be delivered through the method you selected during MFA setup.
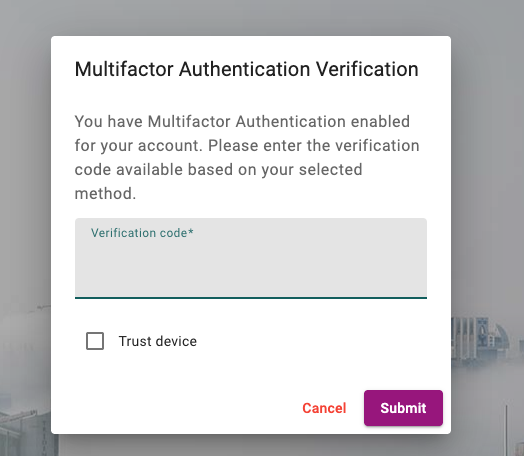
You can also choose to mark your device as trusted by checking the ‘Trust device’ option. When enabled, you won’t be prompted for a verification code on that device in the future.