The user settings section is available from the menu by clicking your avatar. After selecting the settings menu entry, the system will show various sections where you can set your own default data. In addition to this, you can also build your own profiles in the settings logic, so it will be easy for you to toggle from one profile to another profile.
The sections like organisation, delivery address and accounting also support the so called login profile, which is typically selected by default. The login profiles show the data that was assigned to your user session by the 3rd party system, that was used to launch the guided buying application. For example, the system that provides your initial login data can be a SAP System, Microsoft Active Directory or any other system that serves as identity provider supporting single sign on to BeNeering.
The sections in the setting structure support the following functions:
|
Section |
Function |
Profile (Template) features |
|---|---|---|
|
Organization data |
Assigned default Company Code, Purchasing Organization, Plant and Purchasing Group (not all these features might be available to you). |
The Cross-Company function in the system will rely on the amount of profiles set for the Organization data. e.g. if you have two profiles available, one for company code 1000, the other for company code 2000, then the cross company function in the system will allow you toggling between these companies. |
|
Delivery Address |
By default the login profile might be already assigned to your plant specific delivery address. However, you can define here additional profiles which allow you to switch to another delivery address. This is usefull if you are responsible for the delivery of goods & services to different locations. |
If you created several delivery address profiles, then you can switch the profile directly in user settings. But this will apply only to new items in your basket. Or you can select the profile in your basket on header or item level by using the ‘My Delivery Address’ button. |
|
Accounting |
In most cases your login profile will have your default cost center assigned. However, you can create additional profiles assigning other cost centers. Beyond changing the accounting object like cost center, you can also change your default accounting type, like project (WBS), internal order, etc. |
If you created several acounting profiles, then you can switch the profile directly in user settings. But this will apply only to new items in your basket. Or you can select the profile in your basket on header or item level by using the ‘My Accounting’ button. |
|
Substitutes |
You can select employees, who shall become your substitutes in the buying system. In addition, you can also check the employees who have assigned you as their substitute. |
You can use the Shop-on-behalf function to switch from your user to another user, who granted you the substitute role. |
If you change a profile in user settings, this profile will only apply to new items added to your basket. For example, you change the profile for accounting in user settings, then all existing items in your basket will keep the old cost center, and only new items you are adding will be assigned to the new cost center.
Step-by-Step guide
How to access user settings
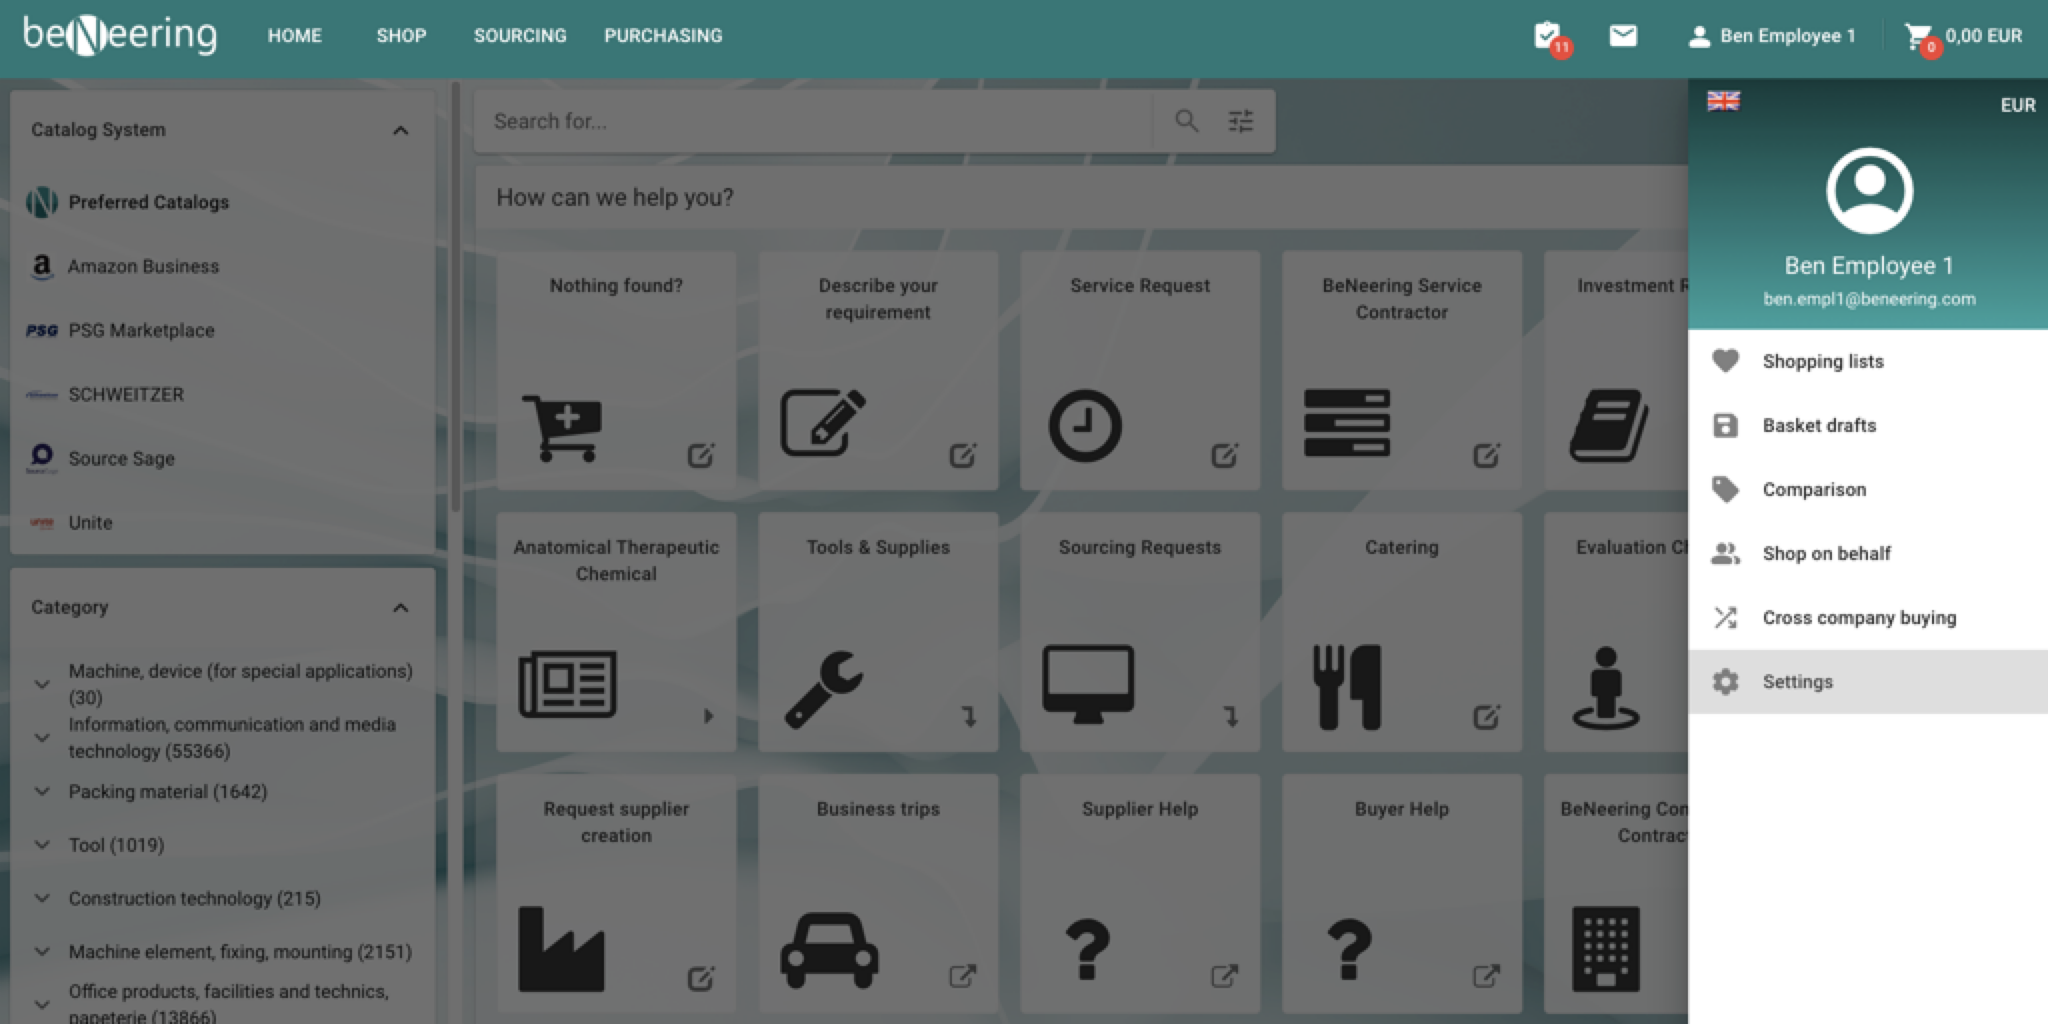
As you can see in the screenshot above, on the left side you can navigate between the user settings. You can navigate to Organization data, Delivery Address, Accounting data and Substitution.
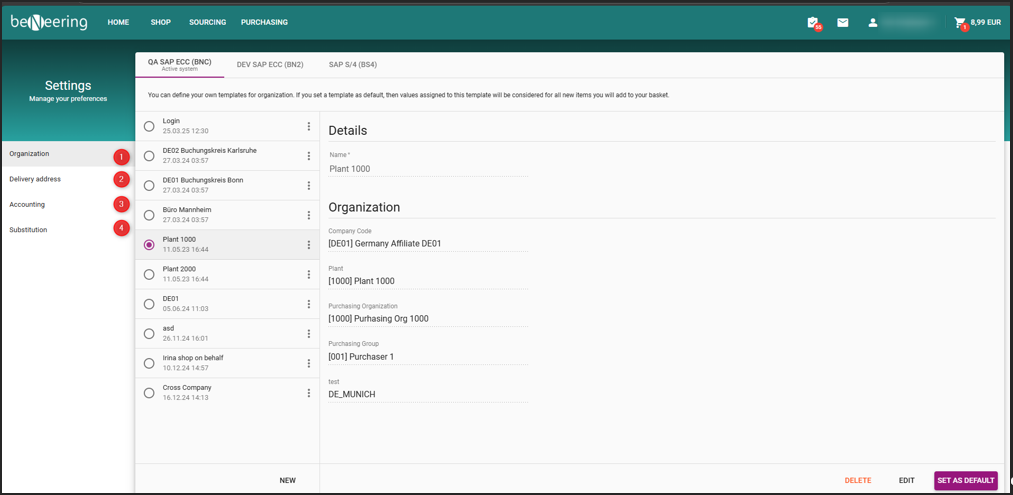
In every of the settings sections you will find the following buttons:
|
Button |
Description |
|---|---|
|
NEW |
Create a new Account / Delivery Address / Organization / Substitute (see point 4) |
|
SET AS DEFAULT |
Set the marked entry as your default (see point 5) |
|
DELETE |
Delete the marked entry (see point 5) |
|
EDIT |
Edit the marked entry (see point 5) |
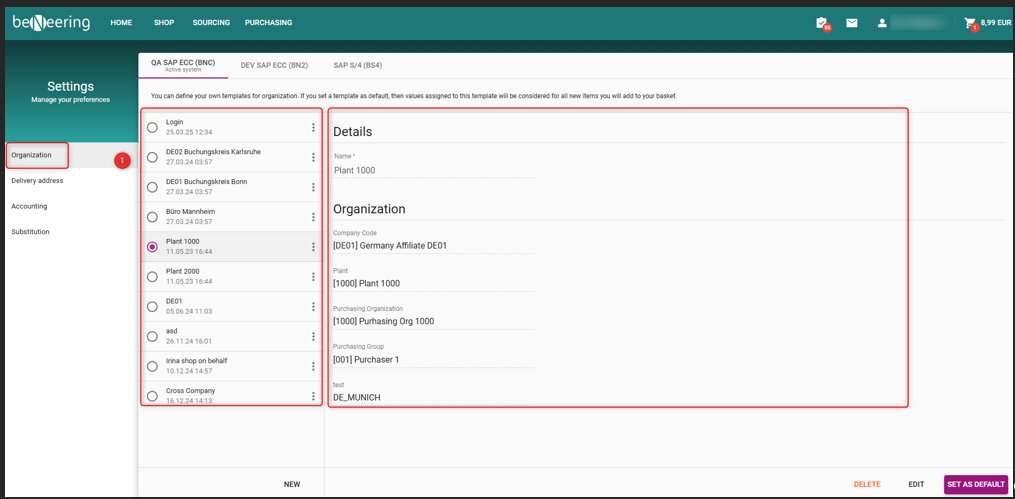
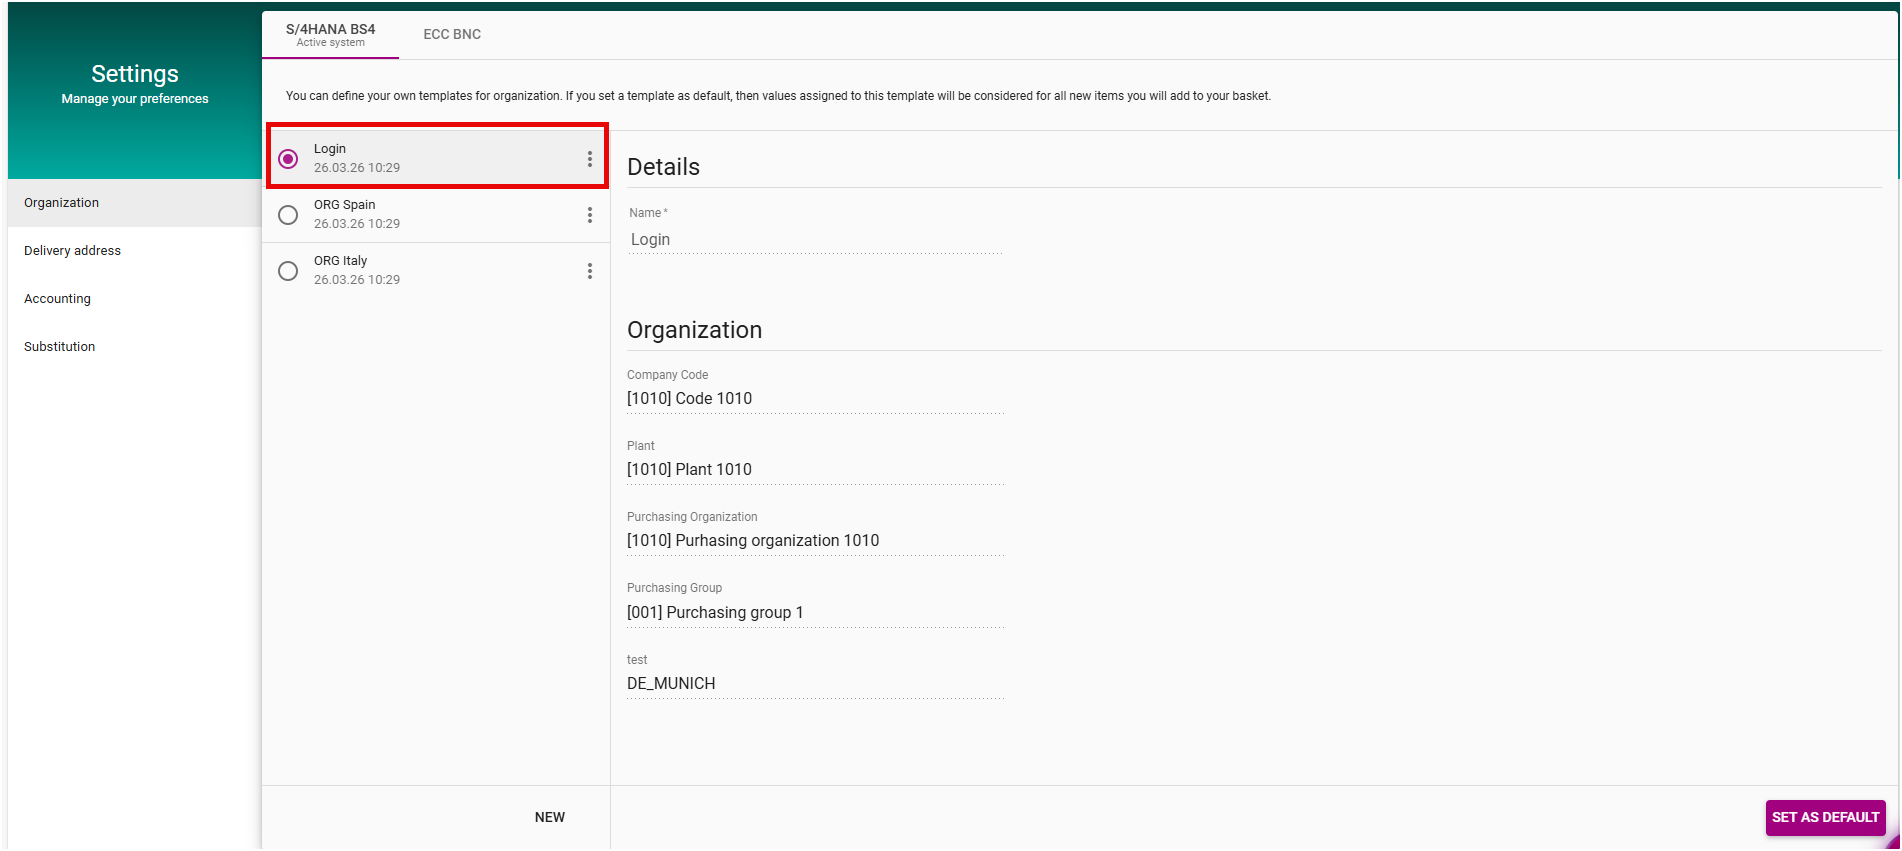
1. Organization Settings
In the Organization window you will see two sides. The left side shows the organization profiles created by you. If you choose one entry, you will see the details of this profile on the right side.
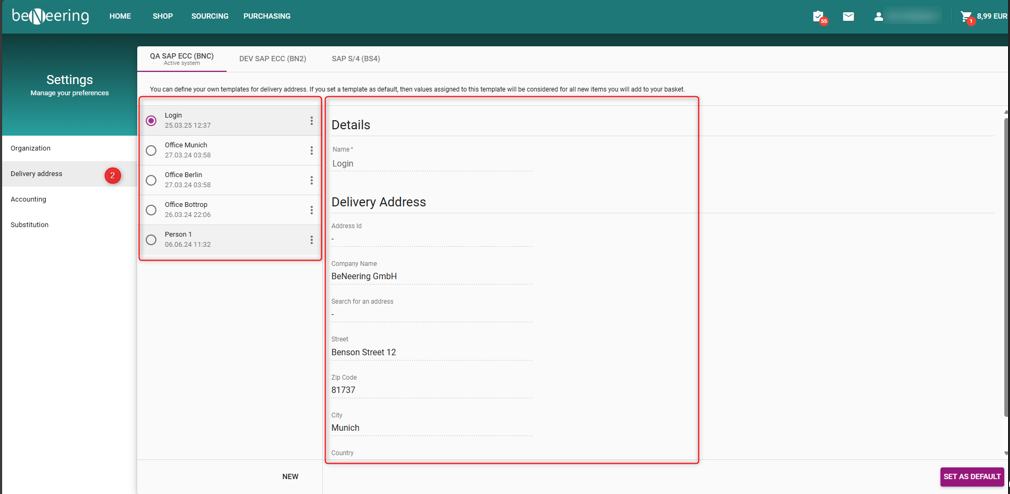
2. Delivery Address settings
In the Delivery Address window you will see two sides. The left side shows the delivery addresses profiles for you. If you choose one entry, you will see the details of this profile on the right side.
3. Accounting
In the Accounting window you will see two sides. The first part shows the Accounting profiles available for you. If you choose one entry, you will see the details of this profile on the right side

In all user settings sections( Organization, Delivery Address, and Accounting) the “Login” entry represents the default configuration automatically assigned to the user upon system login. This defaults settings are provided by the authentication service, which delivers organizational, delivery address, and accounting values based on the user’s profile and authorizations. The “Login” template ensures that users start with the correct, system-approved settings after sign-in.
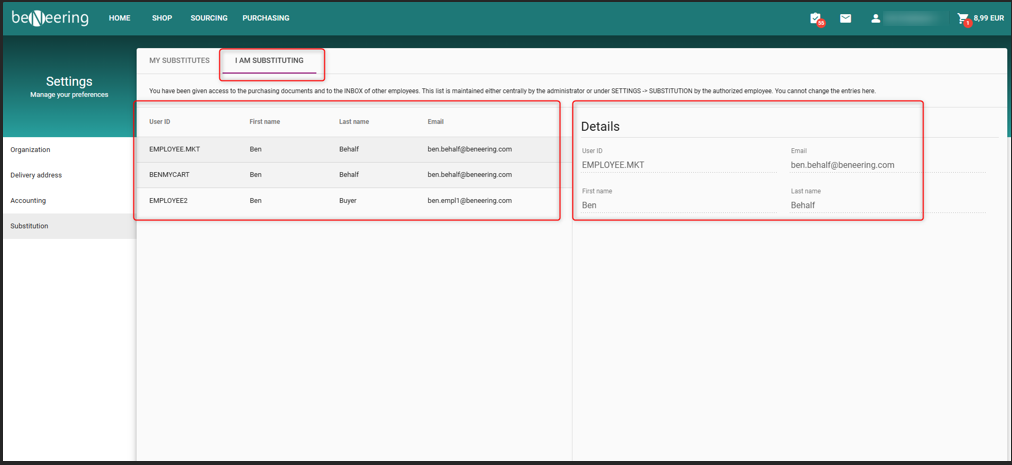
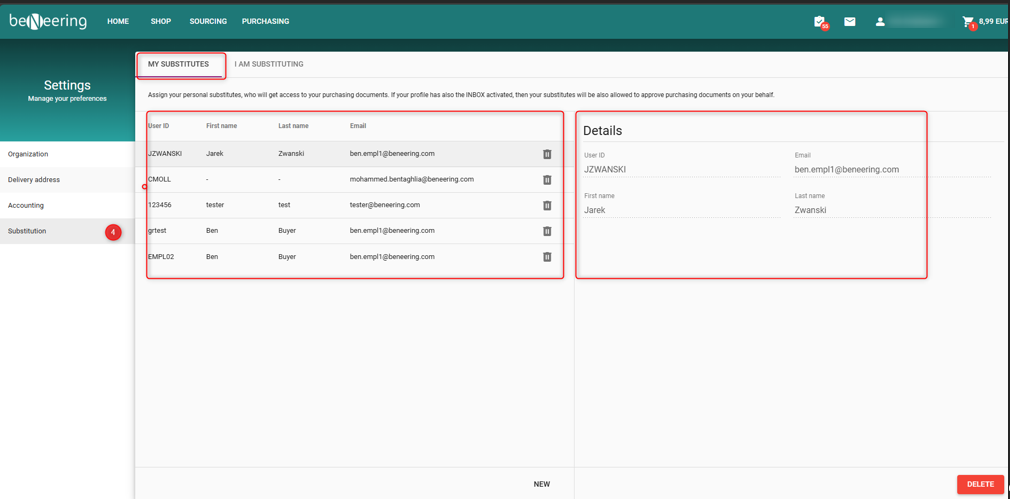
4. Substitution
The Substitution window contains two tabs: The MY SUBSTITUTES tab and the I AM SUBSTITUTING tab. Both consists of two sides.
MY SUBSTITUTES tab
The left side shows your substitutes, so which colleagues substitute you. If you choose one entry, you will see the details of this entry on the right side.
I AM SUBSTITUTING tab
The left side shows for which colleagues you are substituting. If you choose one entry, you will see the details of this entry on the right side.