
New Feature - Now you can select Material Group for each item in your Sourcing Event
Overview
This guide explains how to create and submit a Sourcing Request in the BeNeering Sourcing platform.
A sourcing request allows you to define requirements, select suppliers, add items, and publish a Request for Quotation (RFQ) or similar event.
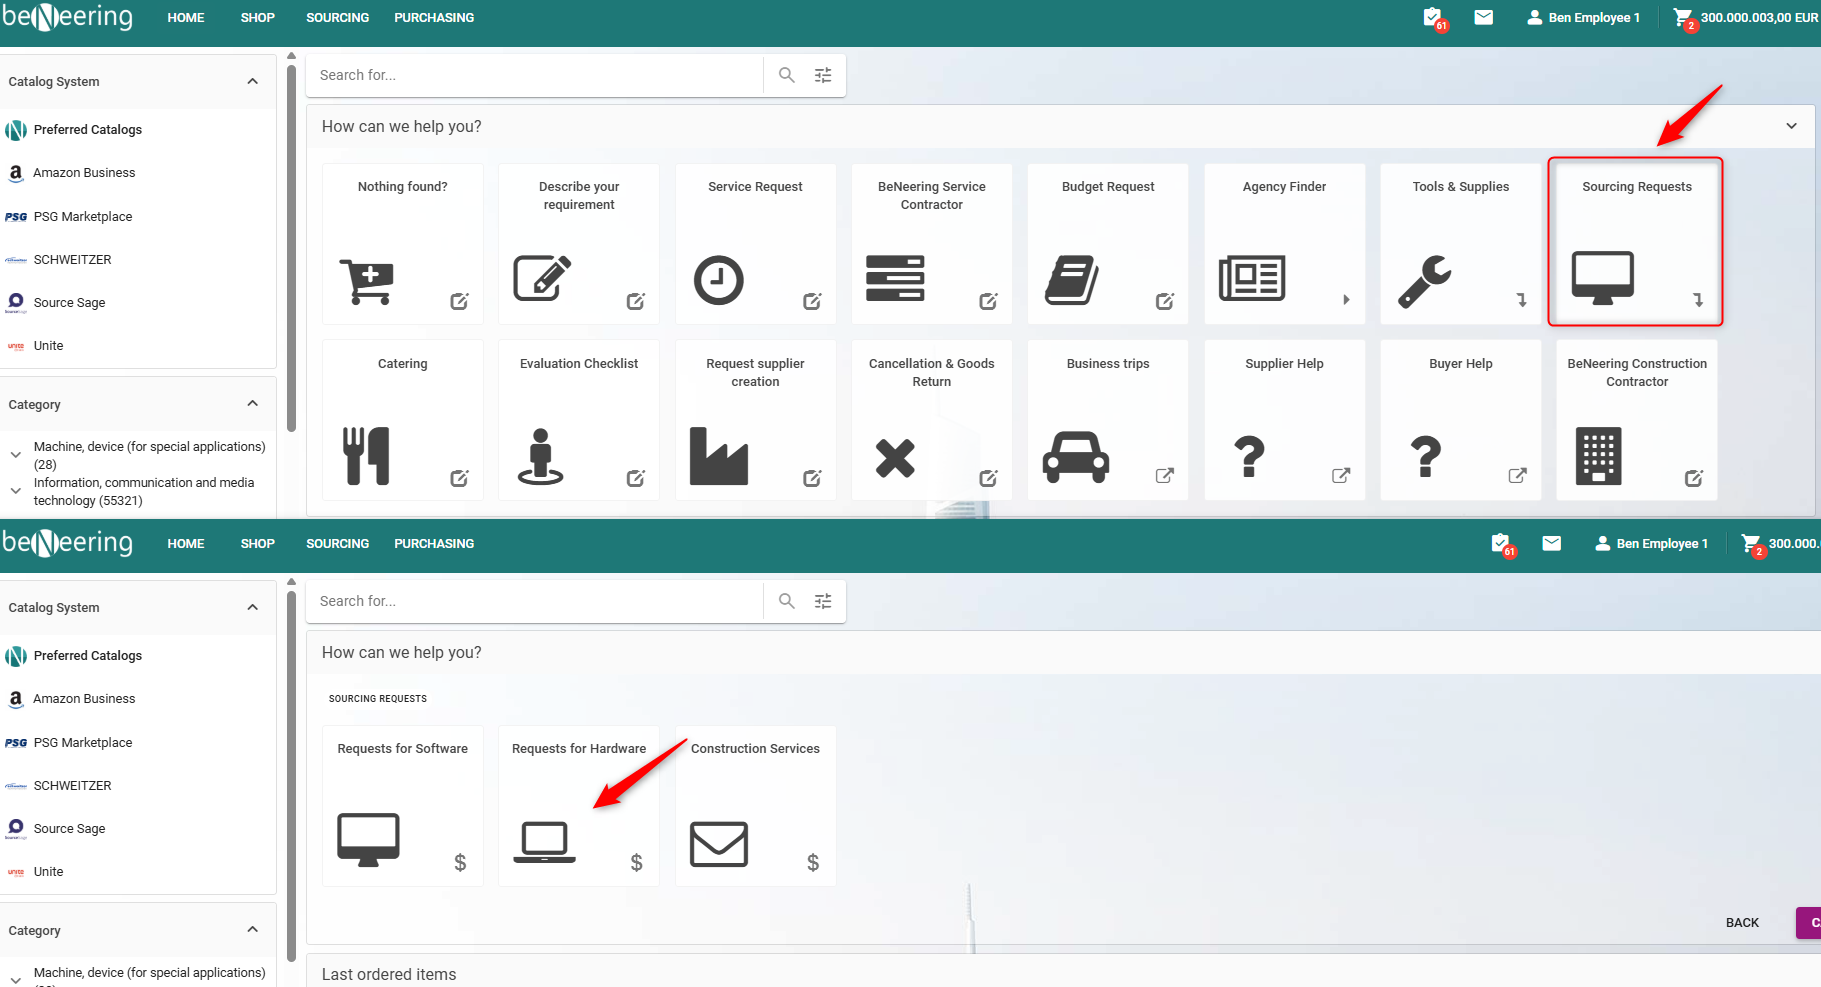
Accessing Sourcing Requests
-
From the Home page, click the Sourcing Requests icon.
-
Select Requests for Hardware (or the relevant category)
Step 1: General Information
The General Information page collects all basic details needed to initiate a new sourcing request.
Actions and Fields
|
Section |
Description |
|---|---|
|
Basic Information |
Enter the request Name, Description, and set Open/Close dates and times. |
|
Additional Data |
Optionally define Date of Performance and add KPIs if applicable. |
|
Delivery Address |
Pre-filled with company and location details (e.g., BeNeering GmbH, Munich). |
|
Attachments |
Upload files via the Select file button. The uploaded files appear with name, size, and upload status. |
|
Terms & Conditions |
T&Cs are displayed as a special subtype attachment so suppliers can easily recognize them. |
|
Contacts |
Add or edit contact persons (Name, Email, Phone, optional Fax). You can also search for existing employees — they must have accessed BeNeering Cloud before. |
Available Buttons
-
Save – Store progress and return later.
-
Next – Continue to the Suppliers step.
-
Submit Request – Finalize and submit the sourcing request (only after completing all steps).

Step 2: Suppliers
This step is used to add and manage the suppliers who will receive your sourcing request.
Supplier Table
Displays each supplier’s ID, Name, and Email.
You can:
-
Edit a supplier (✎)
-
Remove a supplier (❌)
-
Add a new supplier (+ New)
-
Search for existing suppliers (Search)

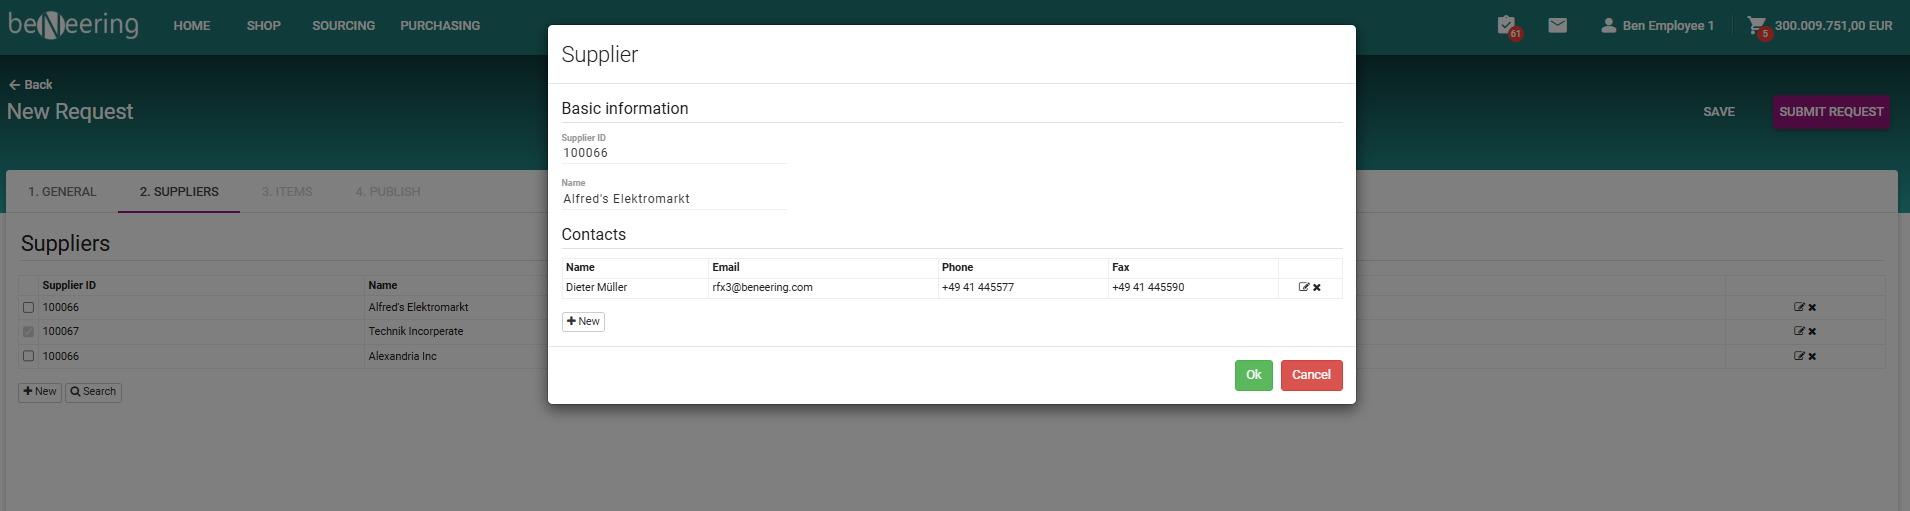
Editing Suppliers
-
When you click Edit, the Supplier Edit window opens.
-
You can view or update Basic Information and manage Contacts for that supplier.
-
Use + New to add a new contact.
-
Click OK to save or Cancel to discard changes.
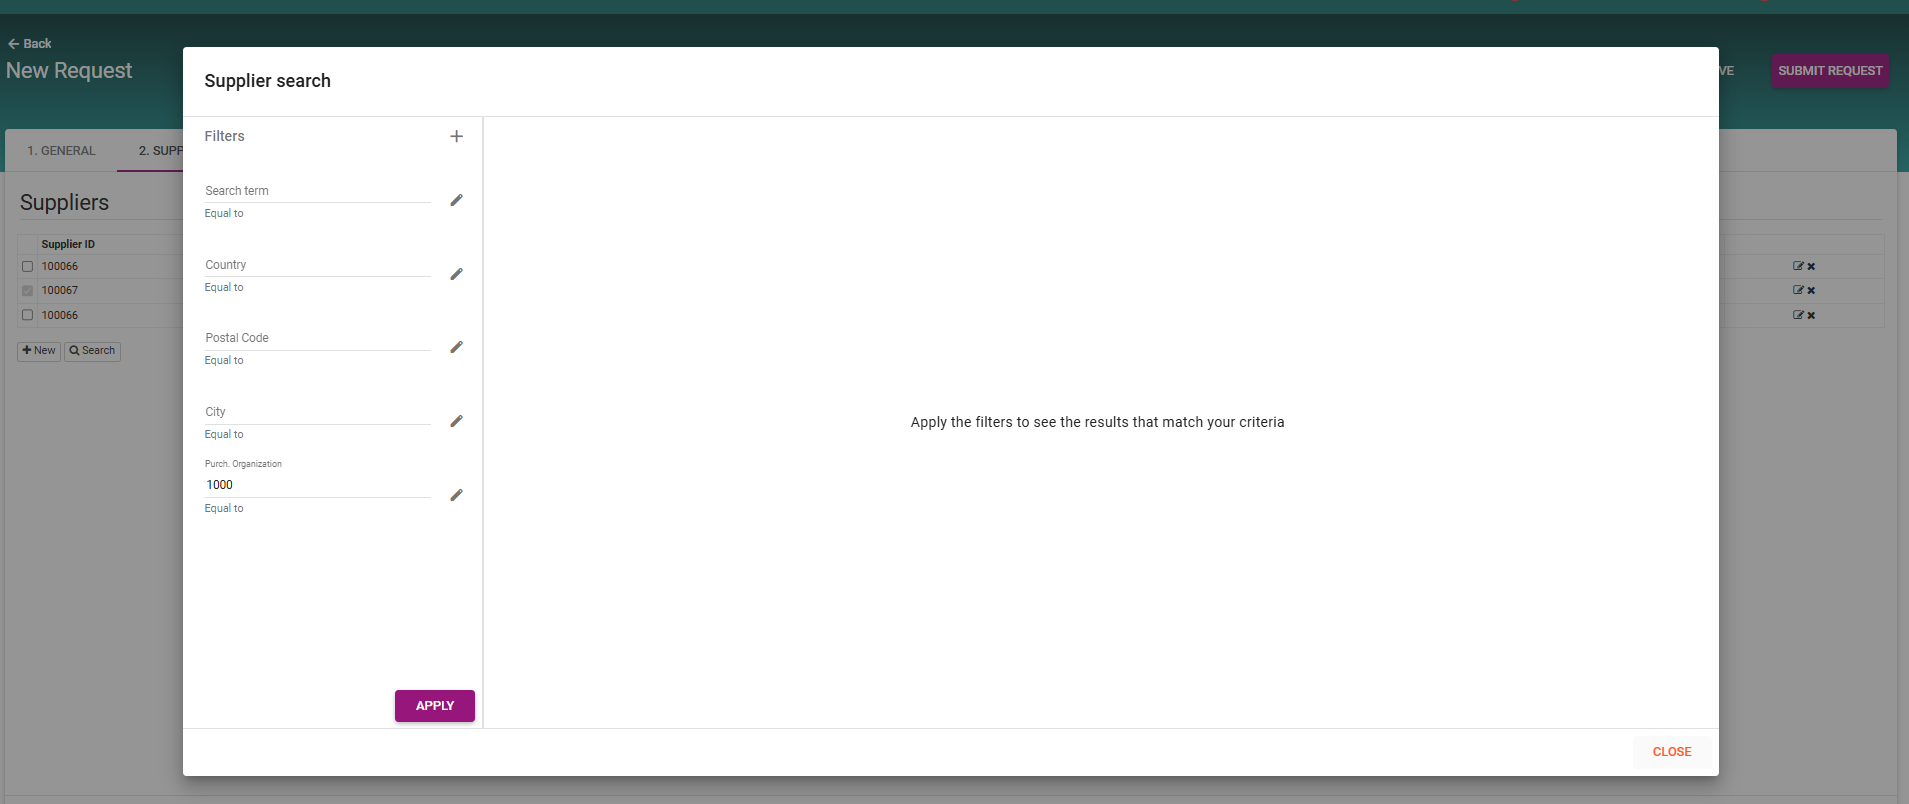
Searching Suppliers
-
Click Search to open the Supplier Search window.
-
Use filters such as Search Term, Country, Postal Code, City, and Purchasing Organization.
-
Click APPLY to view matching results.
-
Select the supplier and click CLOSE to return.
Navigation
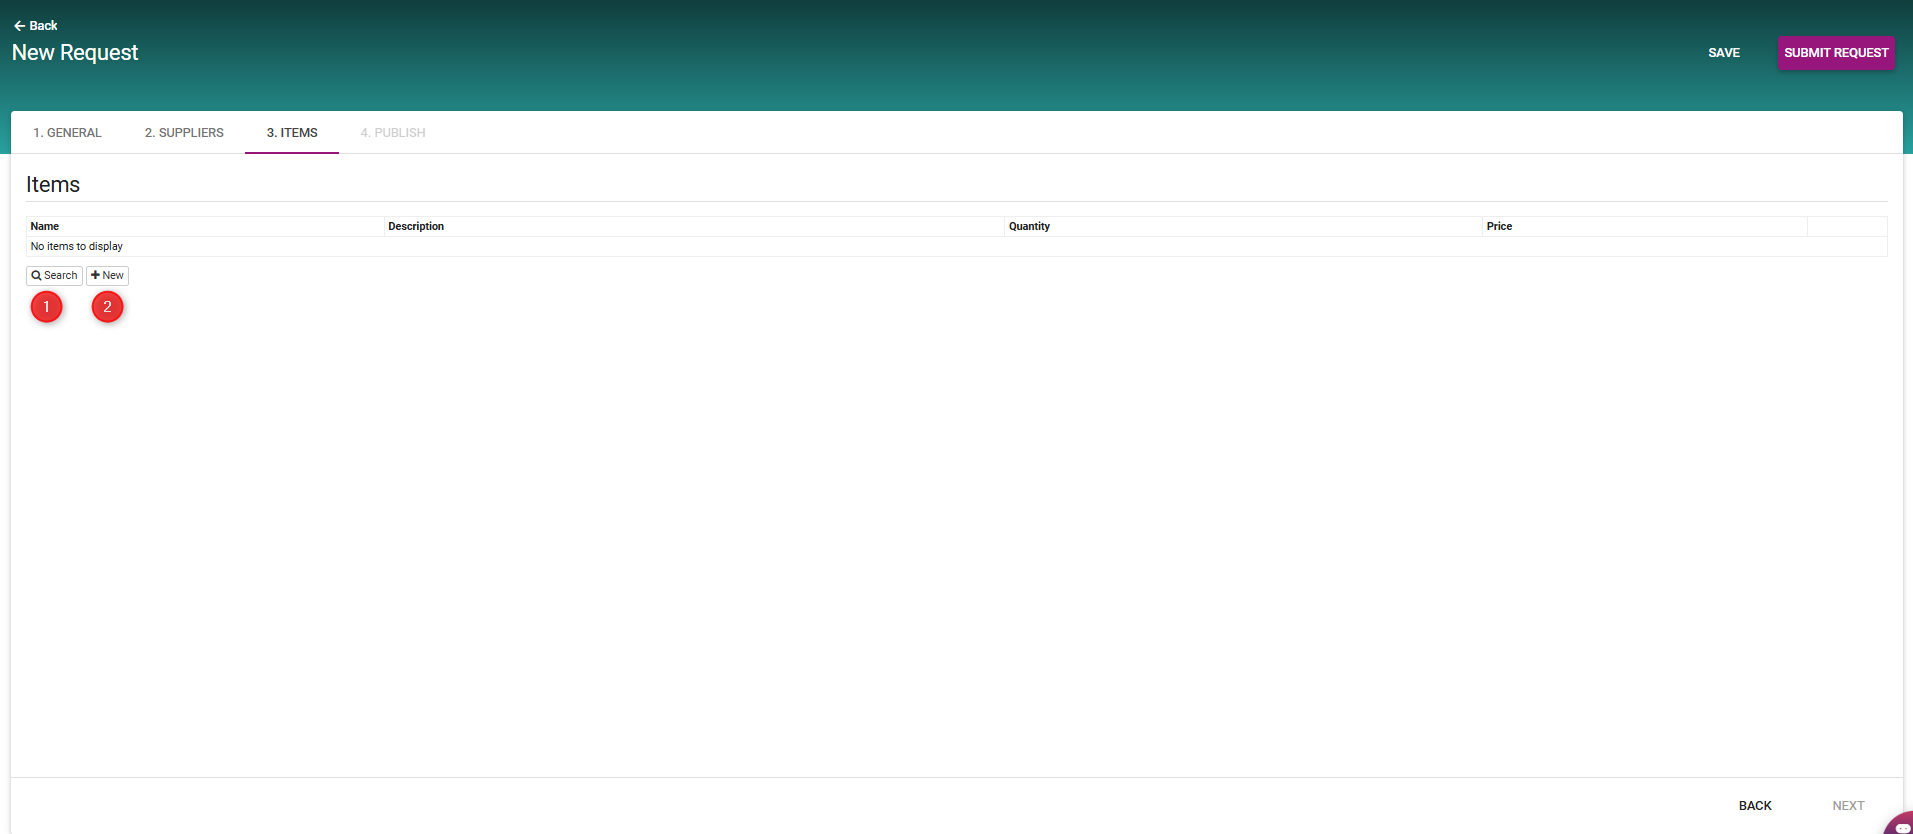
Step 3: Items – Add Requested Products
In this step, you define the items or services to be included in your sourcing request.
Item Table
Displays item details such as:
-
Name
-
Description
-
Quantity
-
Price
Actions
-
+ New – Add a new item manually.
-
Search – Look up existing items to add [from Catalogs]
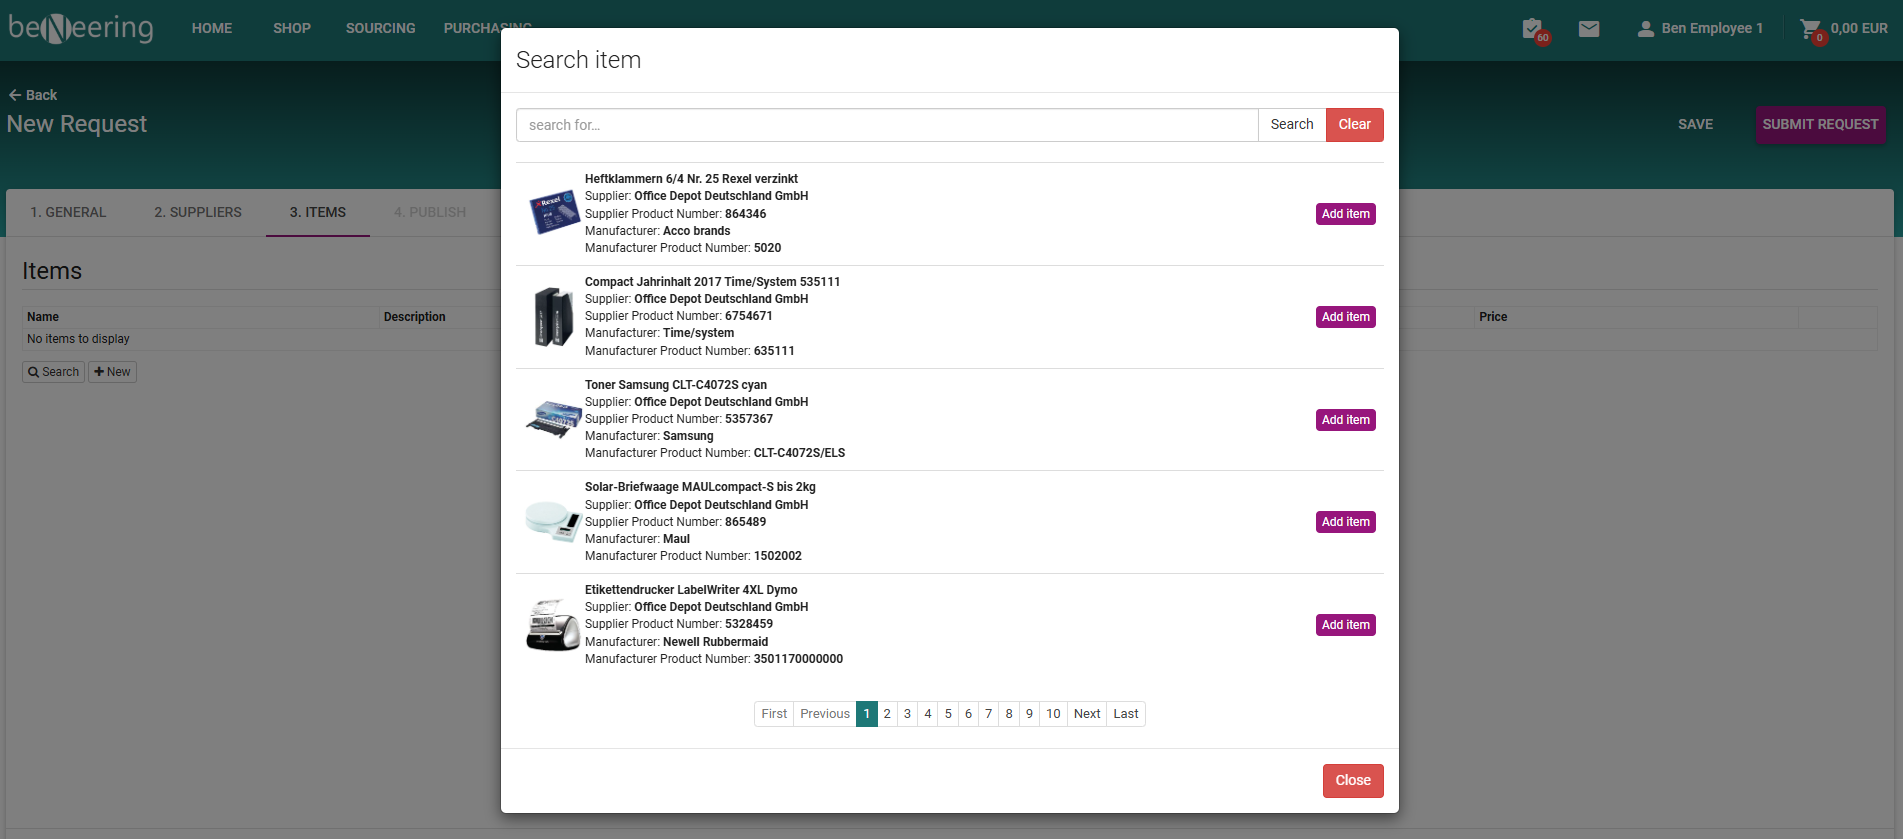
Adding a New Item
When you click + New, the Item Entry window opens.
Basic Information
-
Name (required)
-
Description (optional)
-
Delivery Time (days)
-
Manufacturer Product Number
-
Override Delivery Address (if shipping differs from the default)
Price Information
-
Quantity
-
Order Unit (e.g., Stück)
-
Price per Unit
-
Currency (e.g., Euro)
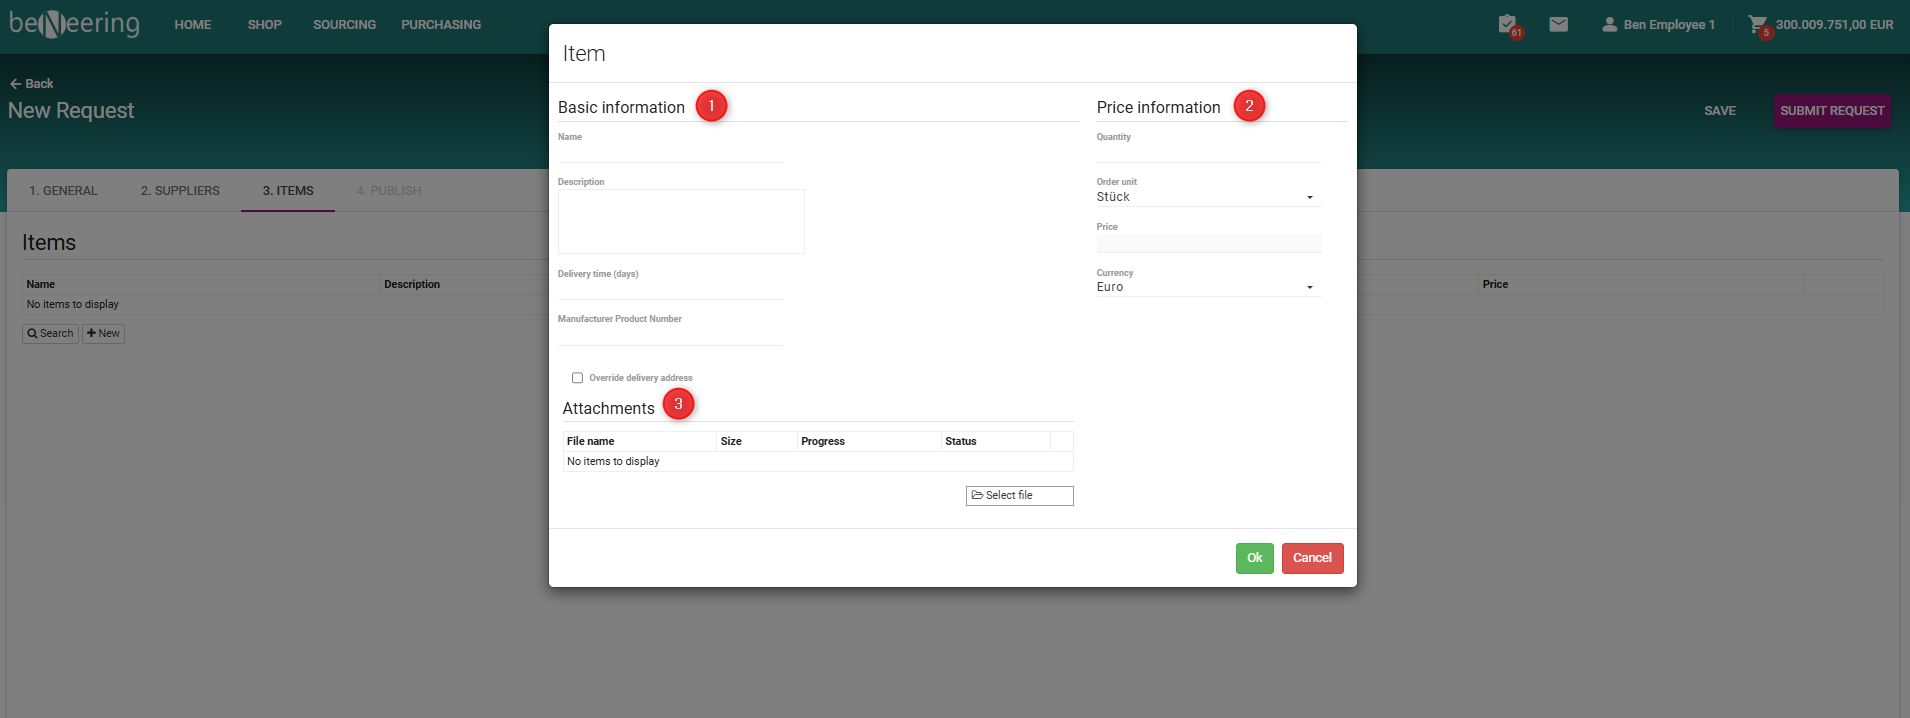
Attachments
Use Select file to upload supporting documents.
Click OK to save or Cancel to discard.
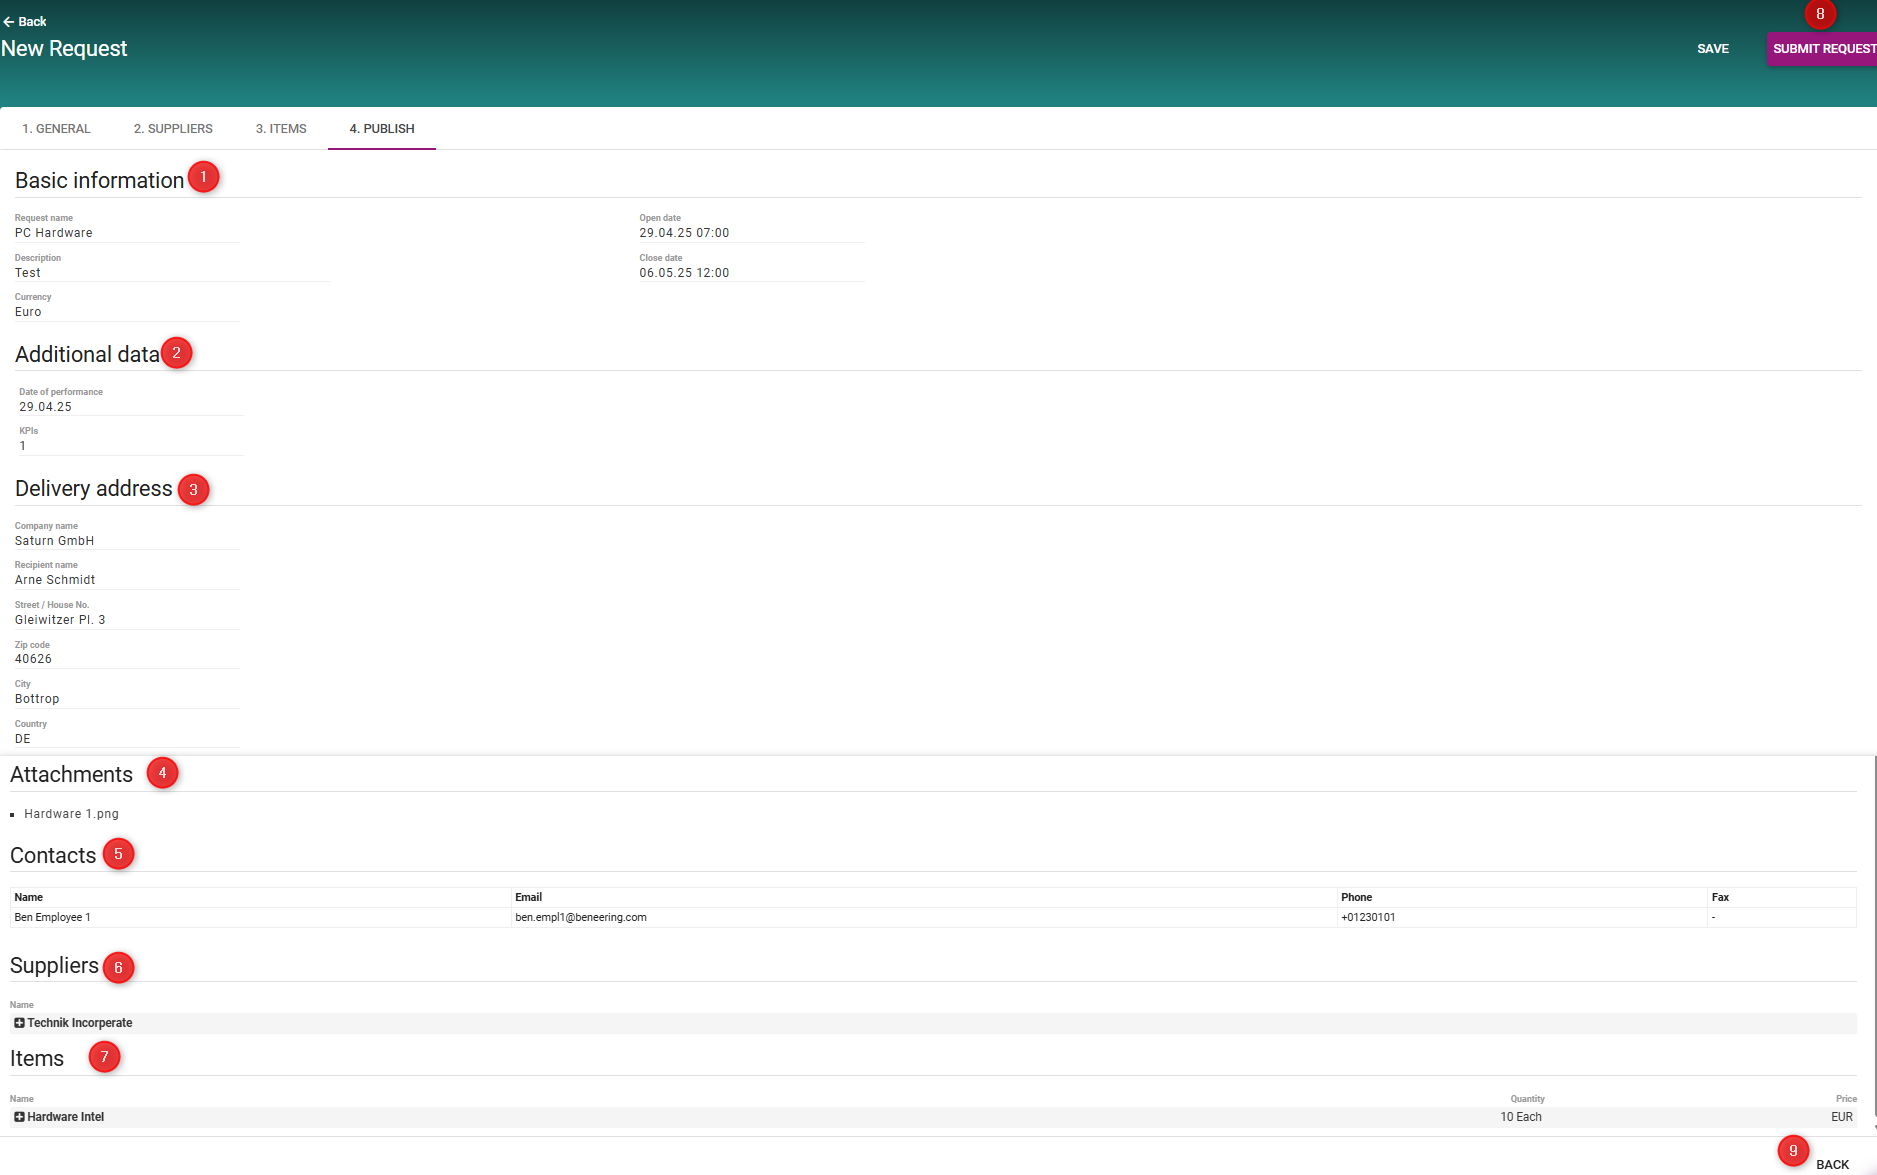
Final Step: Publish
The Publish page summarizes all request details for final review before submission.
Review Sections
-
Basic Information – Request name, description, currency, open/close dates
-
Additional Data – Performance date, KPIs
-
Delivery Address – Company, recipient, location
-
Attachments – All uploaded files
-
Contacts – All associated contact persons
-
Suppliers – Selected suppliers with IDs and emails
-
Items – Requested items, quantities, and prices
Actions
-
Submit Request – Finalize and publish your request.
-
Back – Return to previous steps to make changes.
New Feature - Now you can select Material Group for each item in your sourcing event
You can now select a Material Group for each item in your sourcing event. This helps classify items correctly and ensures alignment with SAP data.
The Material Group field is available in the Item Details window — next to Currency [see below]
Steps to select Material Group
-
Open your sourcing event.
-
Click Add Item or Edit Item.
-
In the Item Details window, find the Material Group field.
-
Click the dropdown arrow to view the available options.
-
Select the correct Material Group for your item.
-
Click Save.
Additional Information
Some parts can differ for you, as the customer can change some parts of the UI.