Each employee can designate their own substitutes, ensuring that documents and approval requests are automatically shared with the appropriate individuals within the organization, while the original owner retains full control and continuous access at all times.
What are the substitute roles supported
Depending on the configuration of your organization, the following roles may be assigned to substitutes:
|
Module |
Function |
Role |
Description |
|---|---|---|---|
|
PURCHASING |
BUYER |
PURCHASING_PR_LIST |
access to list of purchase requisitions |
|
PURCHASING_PR_EDIT |
edit purchase requisition |
||
|
SUBSTITUTE_SHOP_ON_BEHALF |
Only when assigning substitutes: give access to a person to shop on your behalf |
||
|
PURCHASING_CONFIRMATION_CREATE |
create Confirmation of Goods Receipt |
||
|
APPROVAL |
BUYER |
APPROVAL_DEMAND |
approve demand documents |
|
APPROVAL_PURCHASE_REQUISITION |
approve purchase requisition |
||
|
APPROVAL_PURCHASE_ORDER |
approve purchase order |
||
|
APPROVAL_SOURCING_RFQ |
approve sourcing event |
||
|
APPROVAL_SOURCING_RFM |
approve supplier proposal |
||
|
APPROVAL_SERVICE_ENTRY_SHEET |
approve service entry sheet |
Substitution Overview
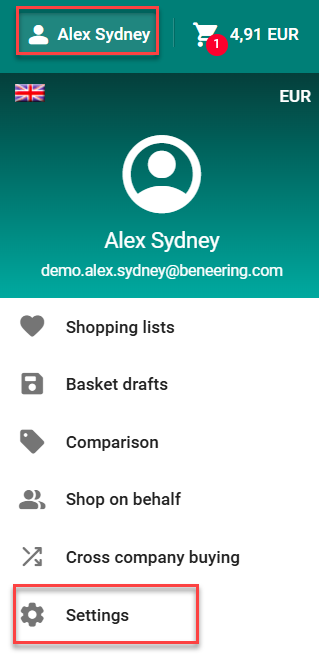
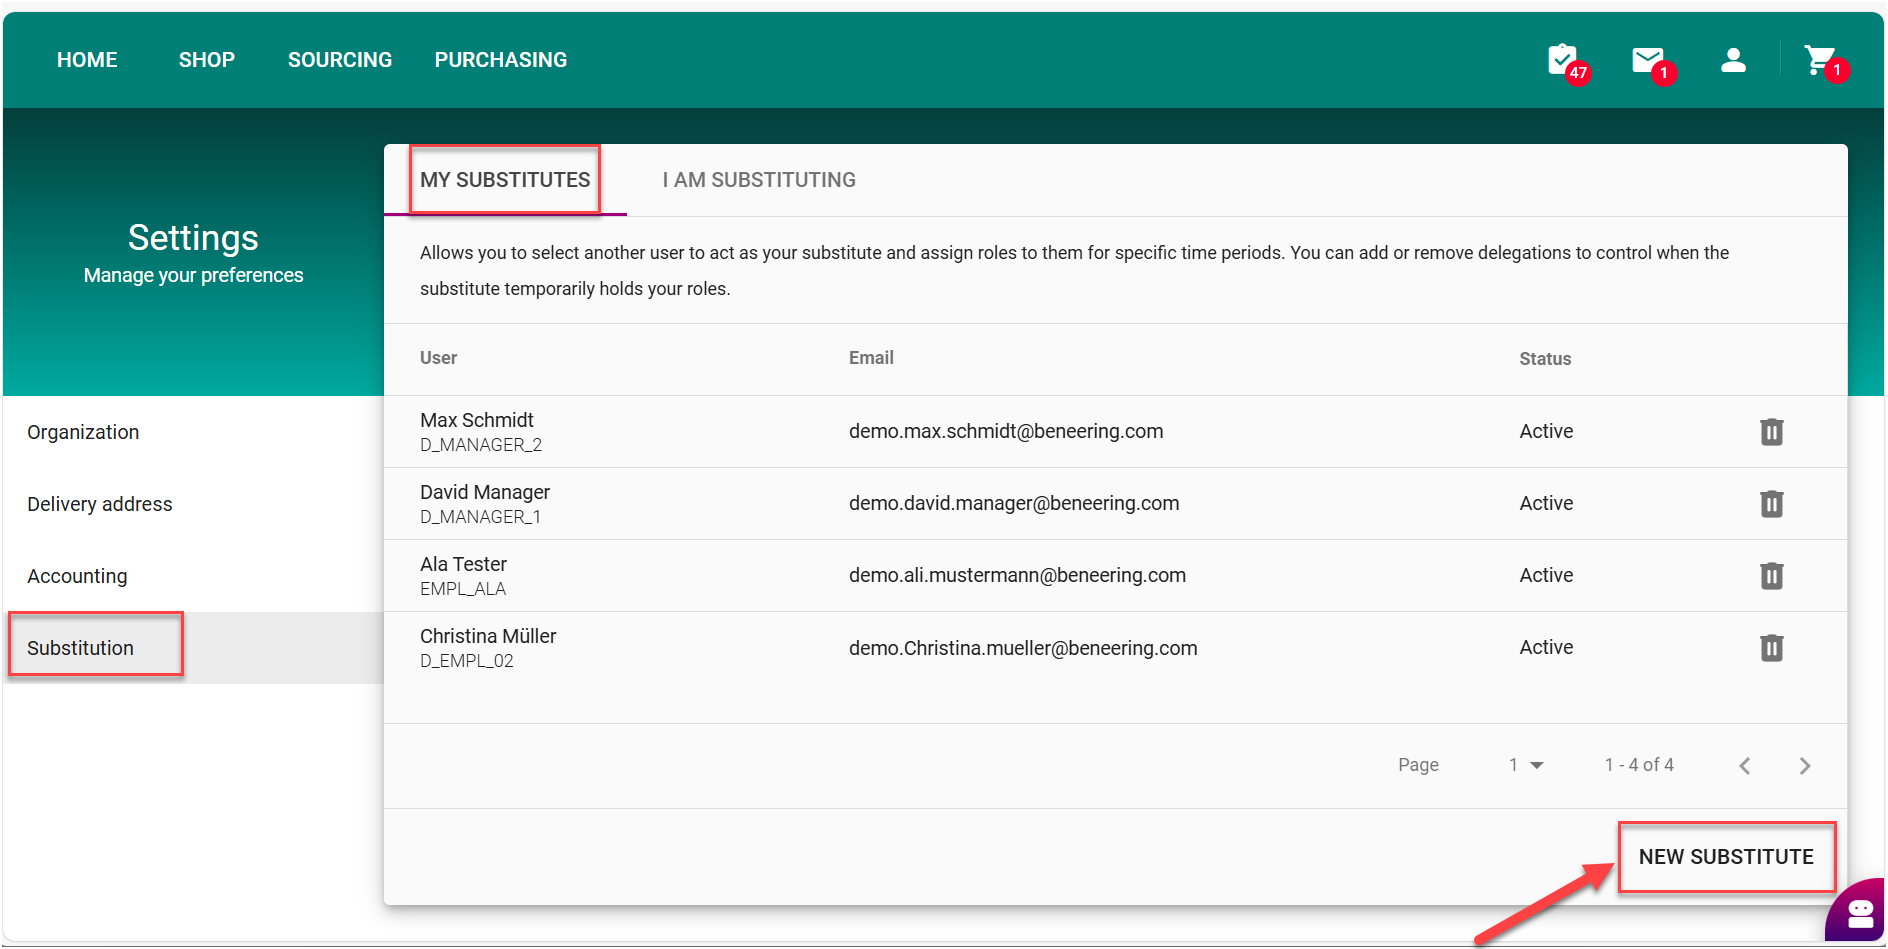
To access the Substitution Overview, please click on your account, From the dropdown menu that appears, click on Settings. This will direct you to the Substitution Overview page.
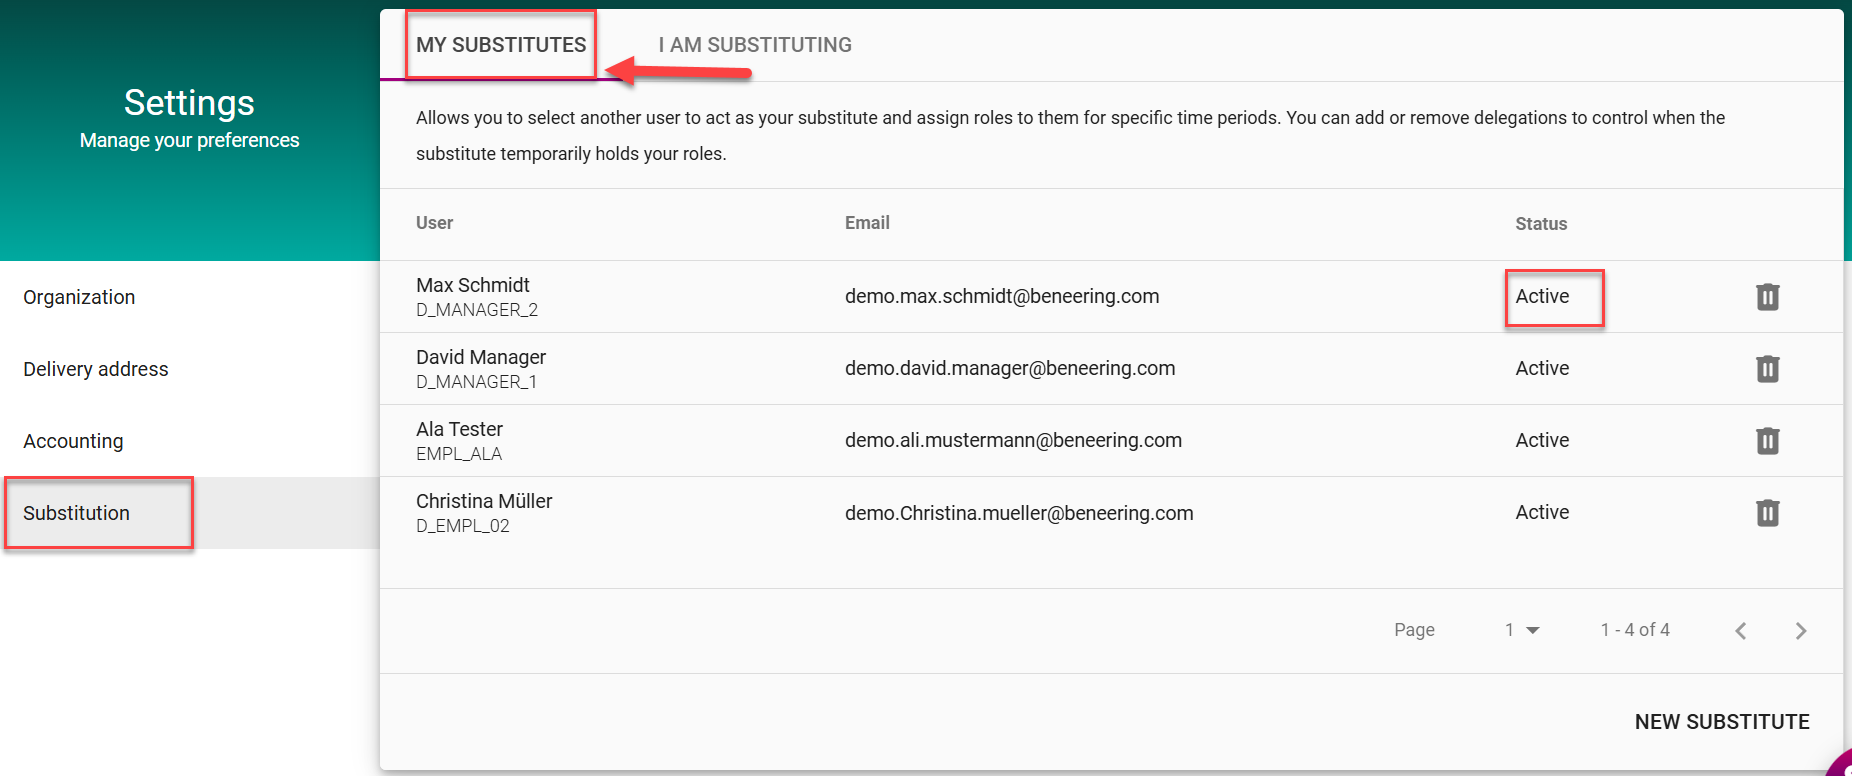
In the Substitution section overview, there are two tabs: My Substitutes and I am Substituting.
-
My Substitutes : This tab lists all users you have designated as your substitutes.
-
A status “Active” indicates that the substitute’s role remains valid, and they are authorized to act on your behalf.
-
-
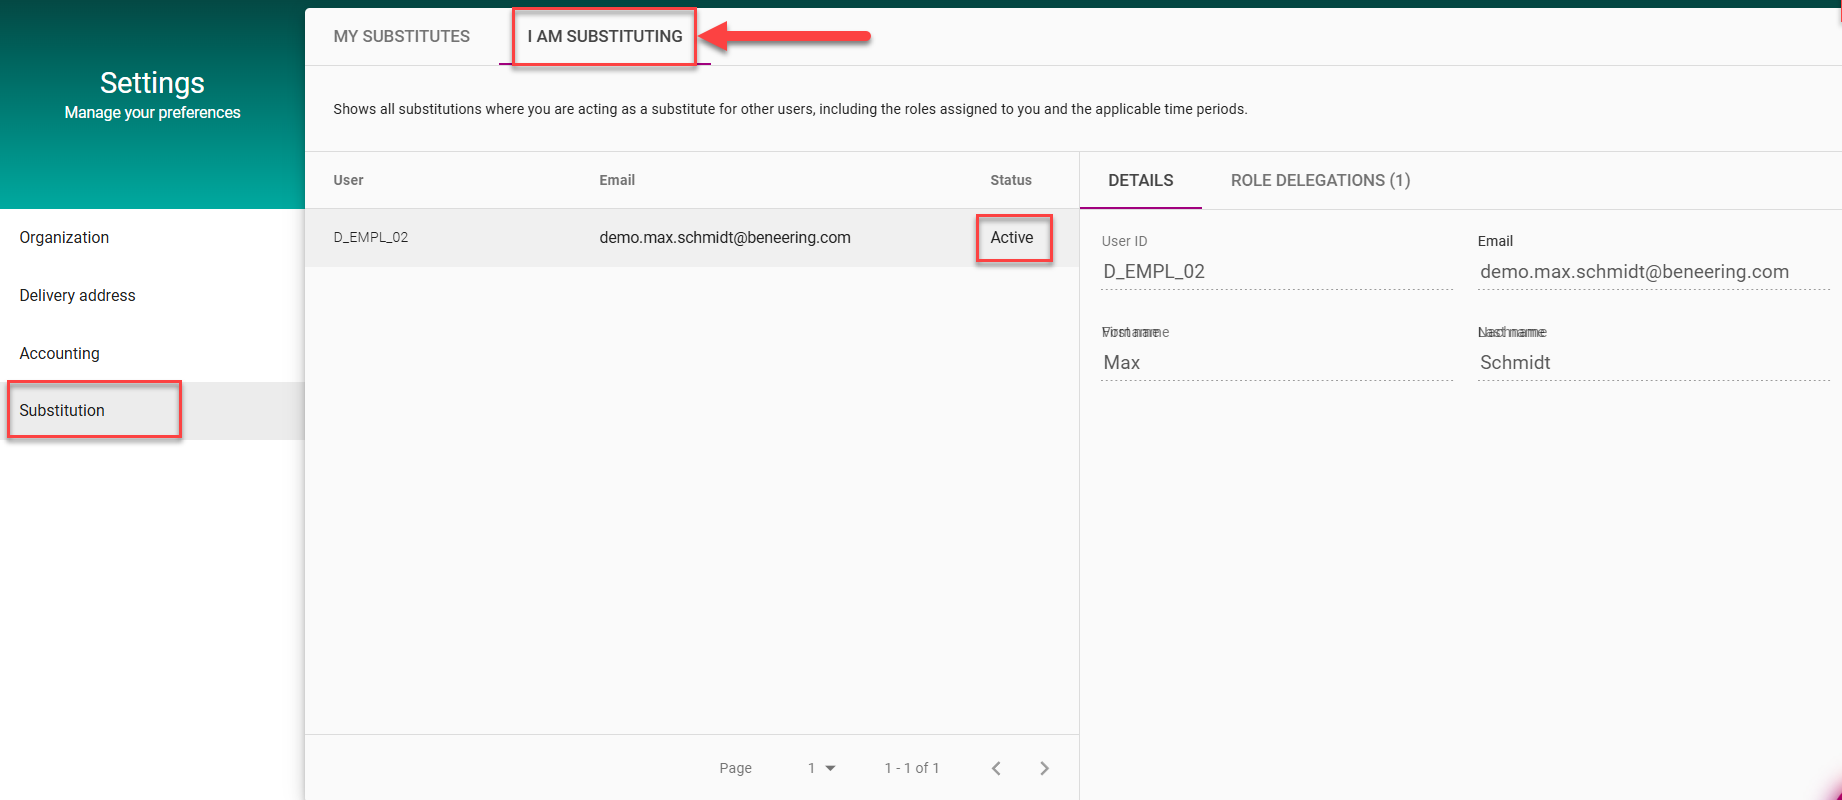
I am Substituting : This tab displays all users for whom you currently serve as a substitute.
-
A status “Active” indicates that your authorization is valid, and you are able to continue acting on behalf of these users.
-
In both tabs, information is presented in a table format, including the following columns: First Name, Last Name, Email, and Status.
How to set up Substitute Role(s)
Create a new Substitute
-
Navigate to Settings.
-
Open the Substitution Section.
-
Click New Substitute.
-
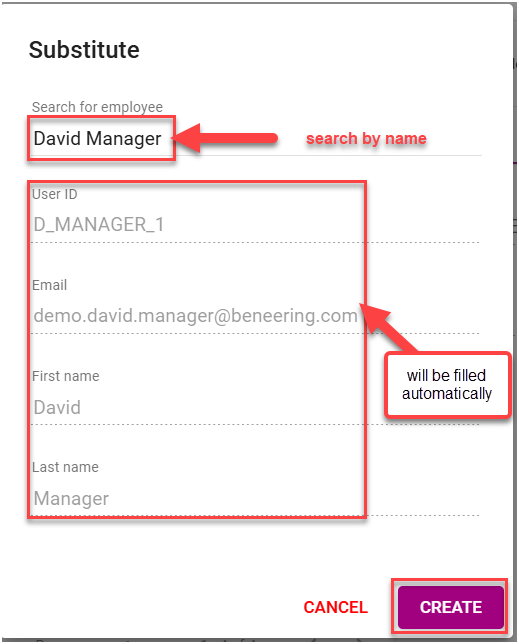
A pop-up window will appear:
-
Search for the substitute by entering their name.
-
The following fields will be automatically filled:
-
User ID
-
Email
-
First Name
-
Last Name
-
-
Click Create to confirm
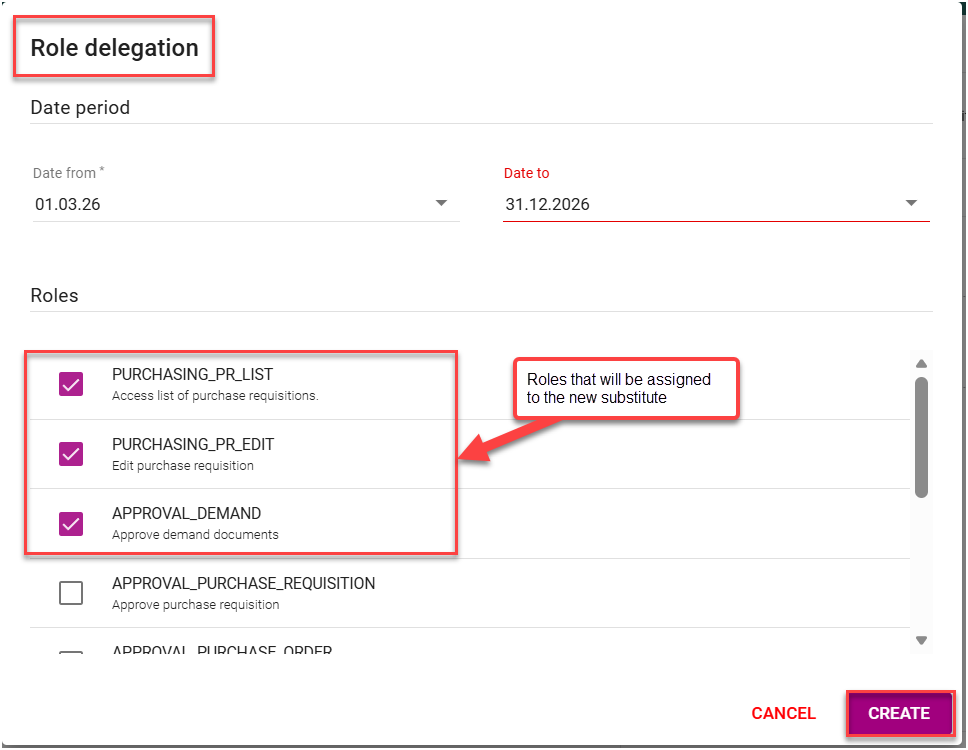
Assign a role/Roles to the Substitute in the Role delegation Screen
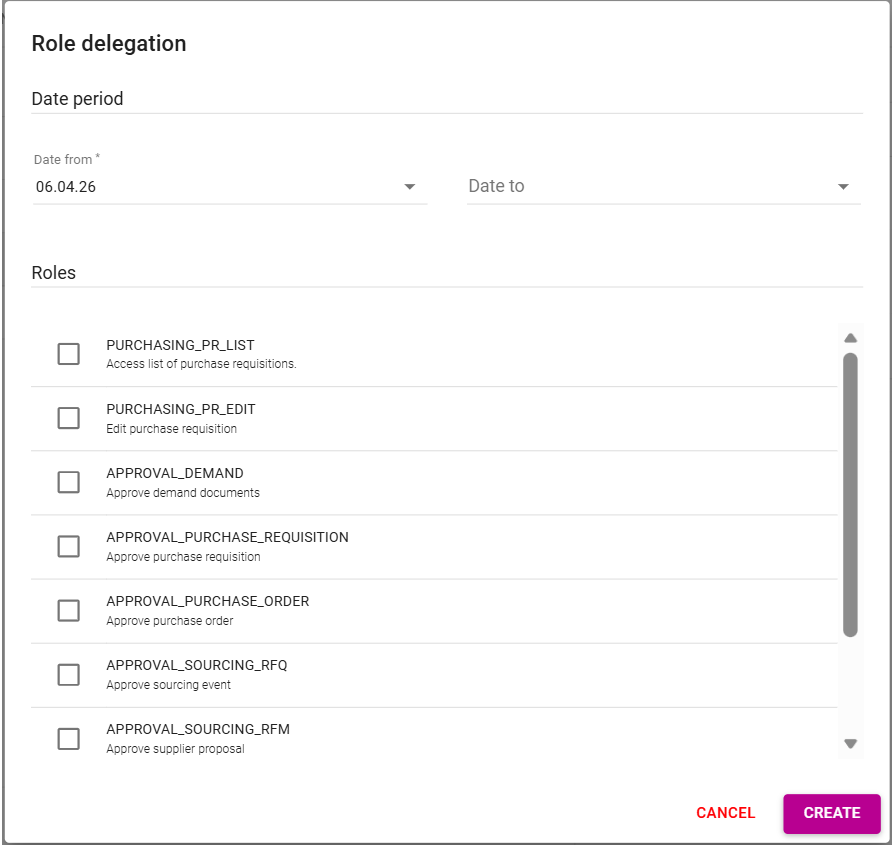
Define the Validity Period (Mandatory)
To assign role(s), a valid period must be defined:
-
Date From: Start date of the role assignment (mandatory)
-
Date To: End date of the role assignment (optional), If `Date To´ left empty, the role will remain active for an unlimited period.
Select one or more roles to assign to the substitute and press create
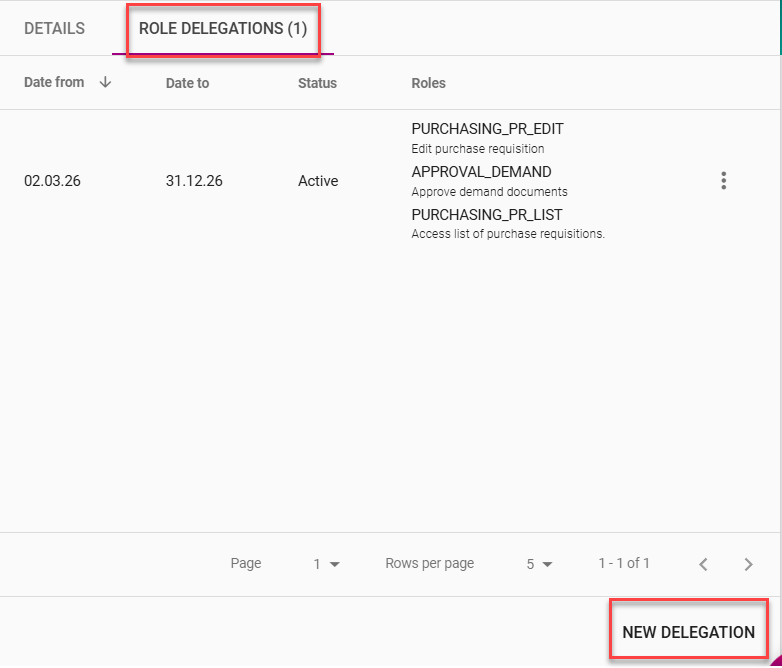
A confirmation message will be displayed indicating that the role(s) have been assigned successfully.

-
The main employee can view all assigned substitutes in their Substitute List.
-
If a substitute already exists, additional roles can be assigned by clicking New Delegation and selecting the required role(s).
Setting Up a Substitute (Substitution Admin)
Prerequisite:
Users must have the Substitution Admin role to access the substitution functionality.
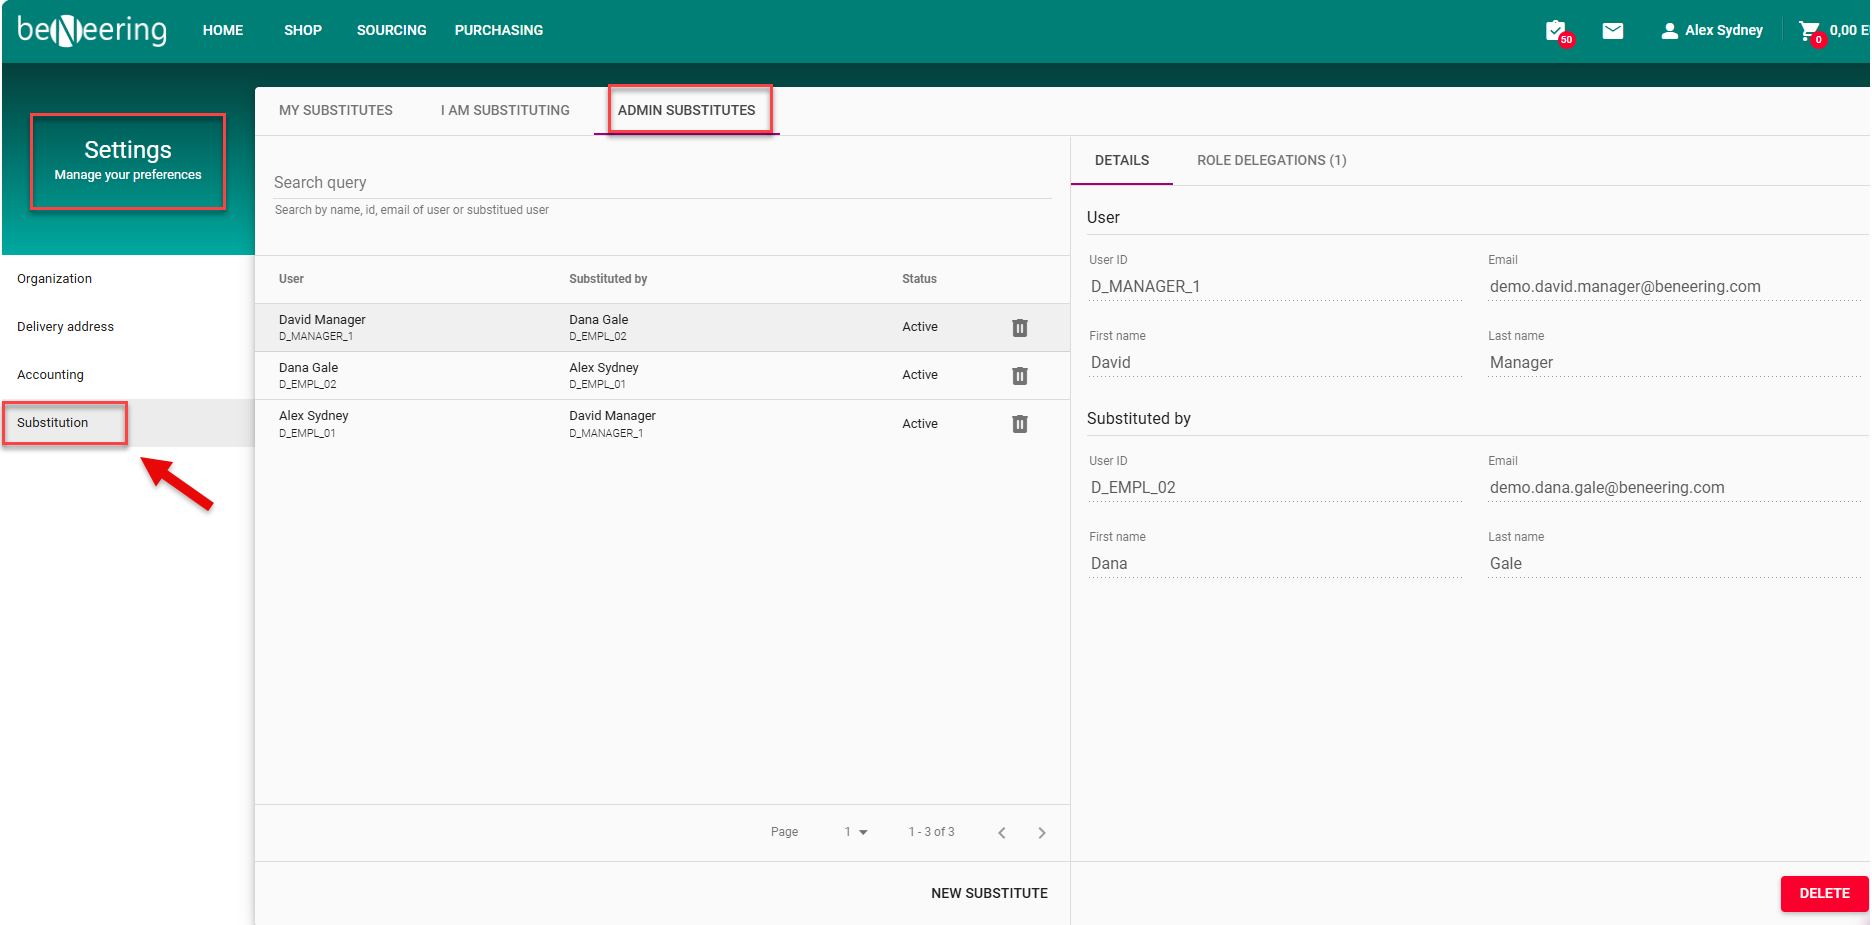
Accessing the Admin Substitutes Tab:
Once you have the role, navigate to the Substitution section and open the Admin Substitutes tab. In this tab, users with the Admin Substitution role can only see the substitute assignments that have been created by Admins.
Specifically:
-
View which users have been assigned a substitute.
-
See which roles are assigned to each substitute.
-
Set up new substitutes as needed.:
Admin Substitutes Functionality:
Users with the Admin role can assign substitutes for other users and define the roles these substitutes are allowed to assume.
Adding a New Substitute:
-
Click New Substitute. A pop-up window will appear.
-
In the User field, search for the person to be substituted.
-
Begin typing their name; if the user exists, their email and user ID will populate automatically.
-
-
In the Substituted By field, enter the person who will act as the substitute.
-
Their email will also populate automatically.
-
-
Click Create to complete the setup
After clicking Create, a success message will be displayed, confirming that the substitute has been created successfully. Immediately afterward, a pop-up will appear automatically to assign roles to the new substitute, following the role delegation process.

Role Delegation for Substitues
Role delegations for substitutes set up by Admins follow the same process as standard role delegation, as described Assign a role/Roles to the Substitute in the Role delegation Screen
How your substitutes access your data
Once a substitute has been assigned, he will be able to access your Purchasing Data and Messages (Inbox) sections.
Purchasing Data
-
Navigate to the Purchasing tab.
-
Enter the date range for which the purchase requisitions of the person(s) you are substituting were created.
-
Enable the filter “I am Substituting” to view purchasing data for the substituted employee.
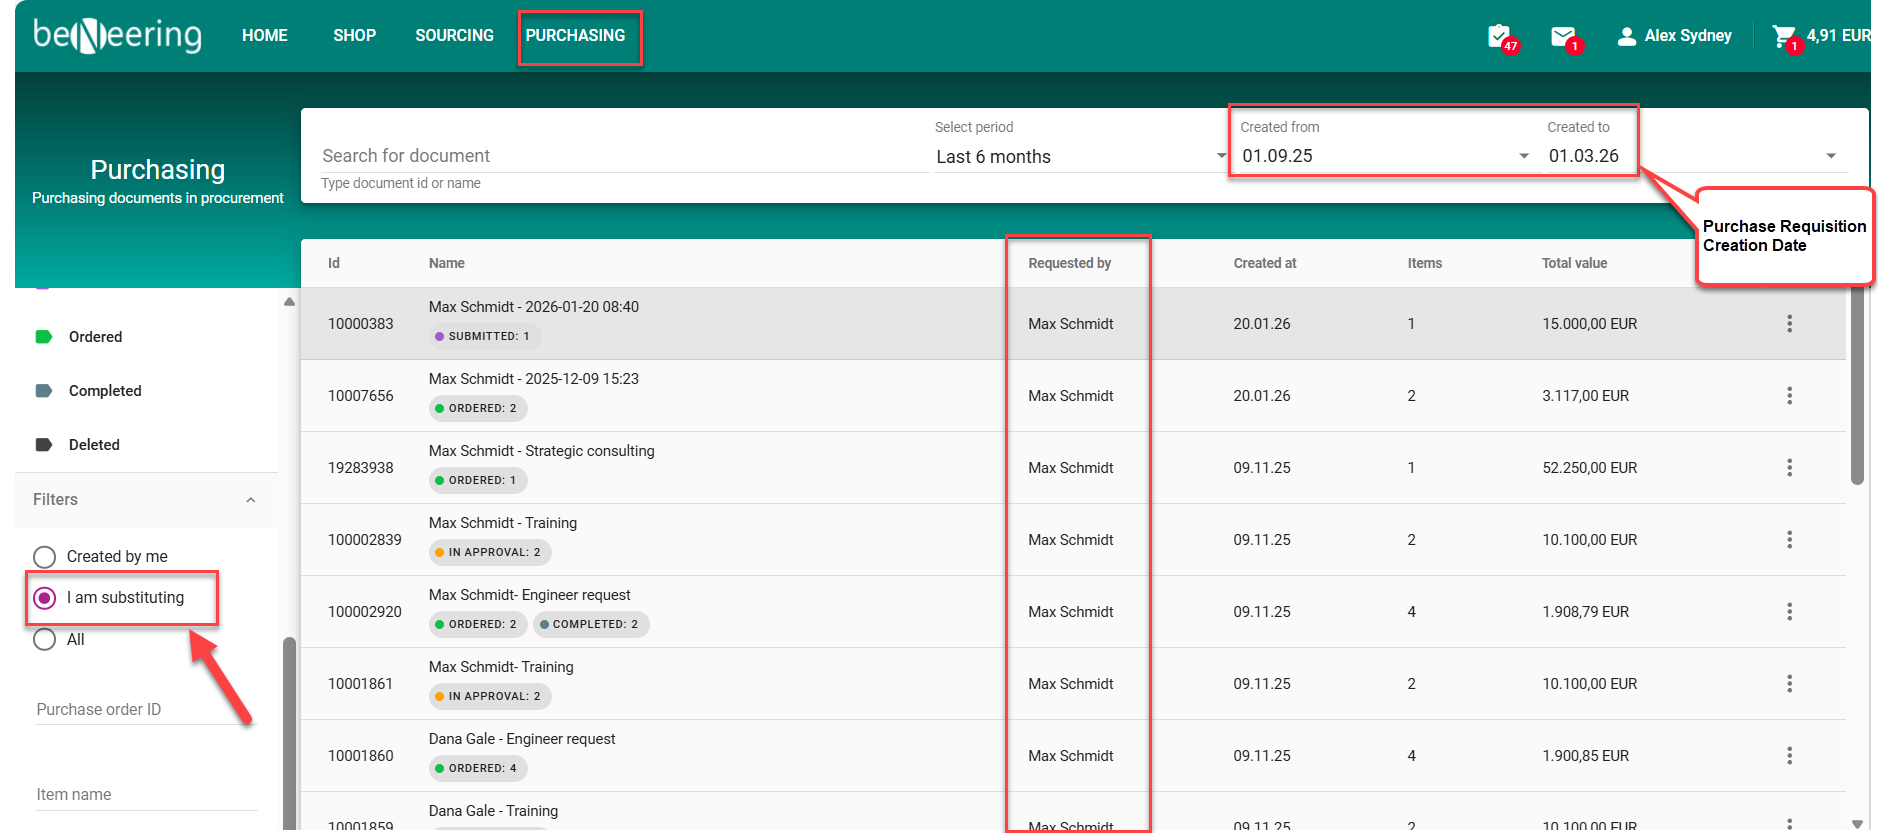
In the Purchase Overview, the Substitute can see all orders placed by the person he is representing as a substitute, including details such as the PR number, creation date, number of items, total price, and the current status (e.g., ordered, in Approval etc.).
the “Requested By” column shows the user for which we are acting as a substitute.
Messages
Option 1:
-
Go to Messages.
-
Activate the filter “I am Substituting” to view messages assigned through substitution.
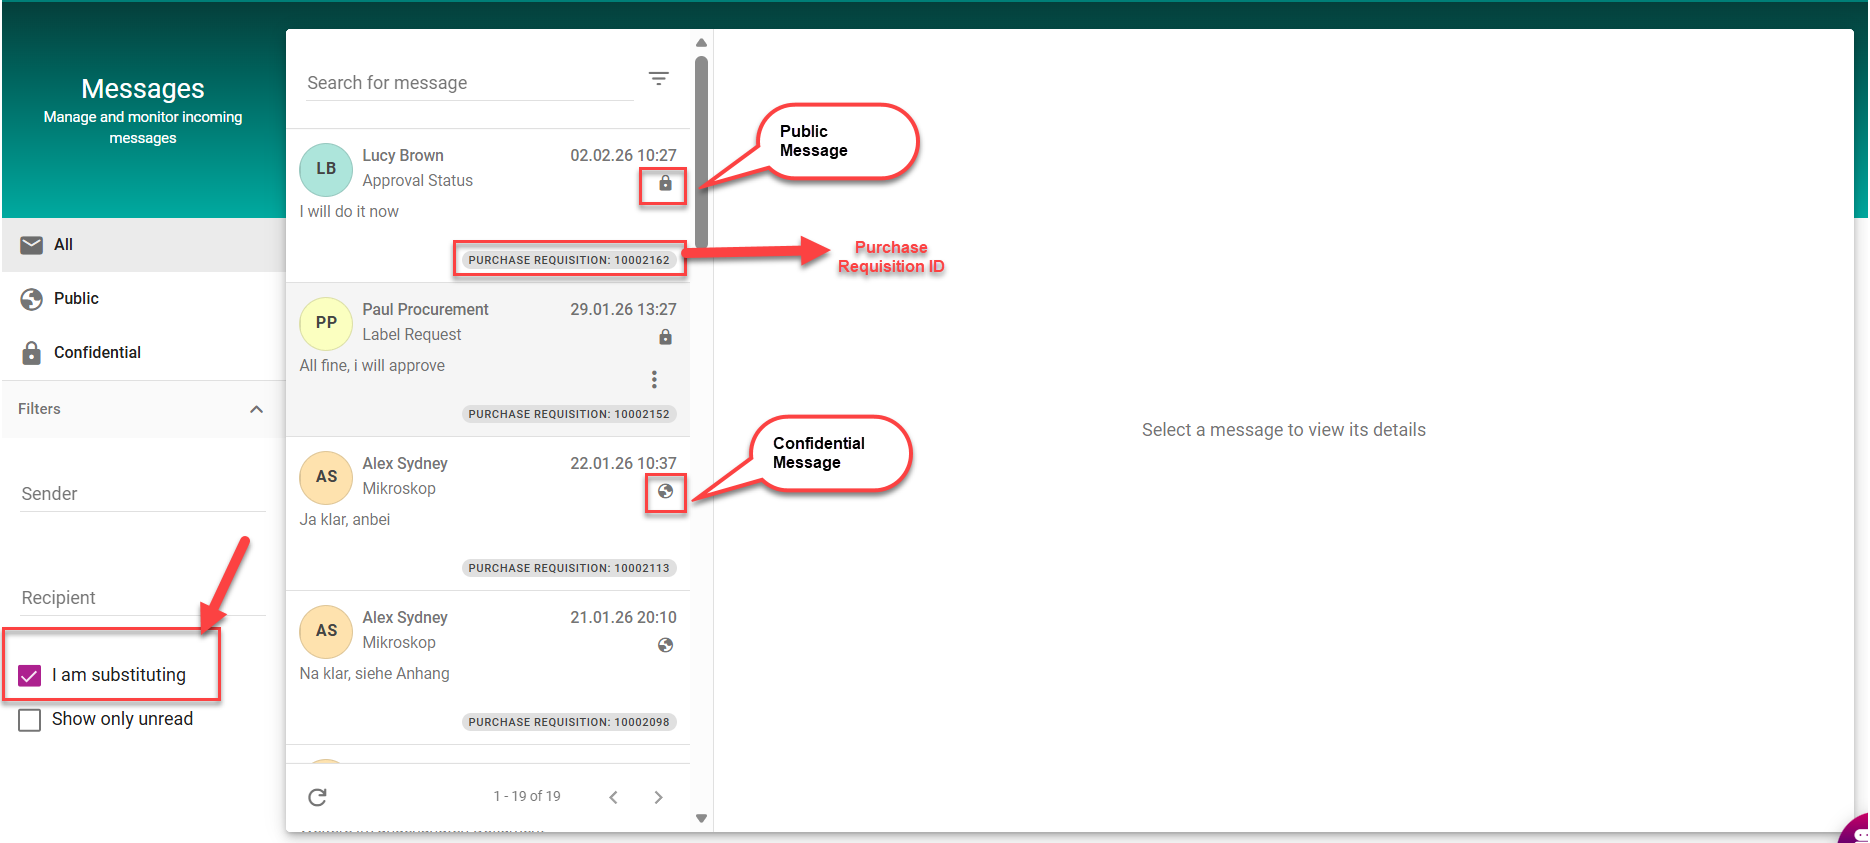
in Messages Overview, the substituter can view all messages and discussions from the person, that he is representing. This includes both public and confidential messages. the substitute is also authorized to reply to these messages.
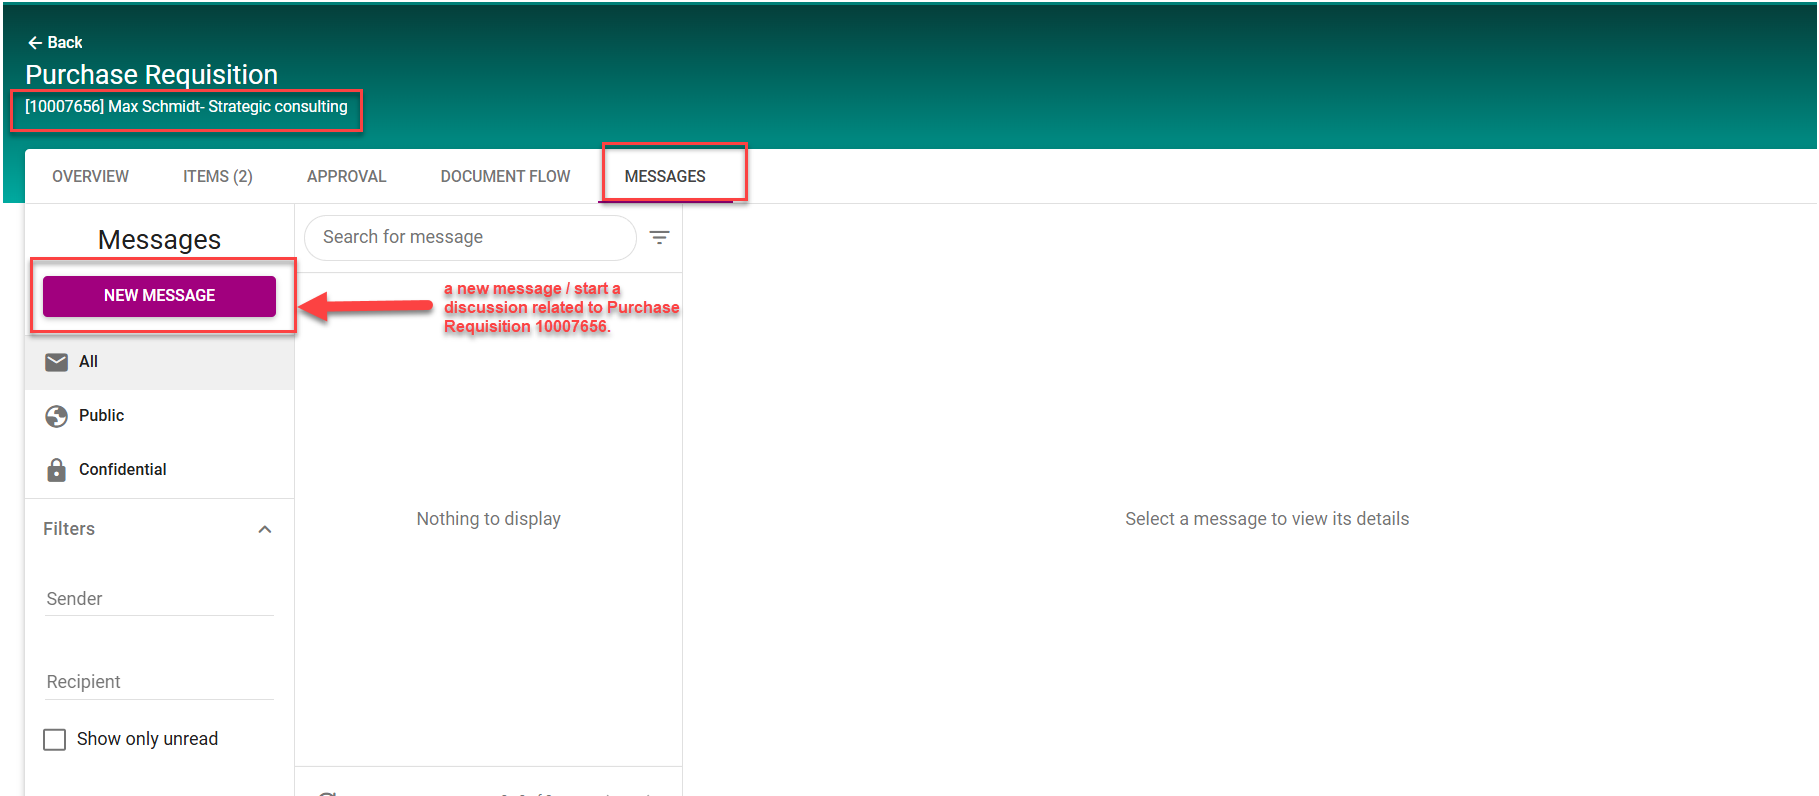
Option 2:
The user opens a Purchase Requisition for which he is assigned as a substitute, he navigates to the Messages section. Within this section, he is authorized to display and reply to existing messages or creates new messages related to the Purchase Requisition.